


各位亲爱的麻瓜朋友们(对,说的就是那个盯着终端界面瑟瑟发抖的你),今天我们要玩一场麻瓜也能轻松通关的魔法仪式——用宝塔面板在本地服务器召唤出那个让代码圈闻风丧胆的”深度摸鱼”神器DeepSeek!
想象一下:当别人还在苦哈哈地敲着黑底白字的命令行,把头发薅成地中海时,你已经翘着二郎腿,喝着肥宅快乐水,用鼠标点点点就建好了AI大模型的老巢。这感觉就像别人在徒手造火箭,而你却从四次元口袋掏出了任意门——别怀疑,宝塔面板就是这个次元壁突破器!
准备好迎接这场”作弊级”的部署之旅了吗?让我们先把SSH咒语、Docker符箓这些吓人的玩意暂时收进抽屉,毕竟今天我们要用的是连你家喵星人都能看懂的图形化操作。系好安全带,三分钟后,你的服务器就要开始吞吐AI智慧的星光啦!✨
本文将指导你在服务器上使用宝塔面板部署DeepSeek,让你轻松享受AI大模型的快乐。
前提条件
- 已安装宝塔面板
没有宝塔的可去宝塔官网注册安装面板
宝塔服务器面板,一键全能部署及管理
操作步骤
DeepSeek 可以使用CPU进行推理,但是推荐使用NVIDIA GPU加速,文末将介绍如何使用NVIDIA GPU加速。
- 登录宝塔面板,点击左侧菜单栏中的
Docker,进入Docker容器管理界面。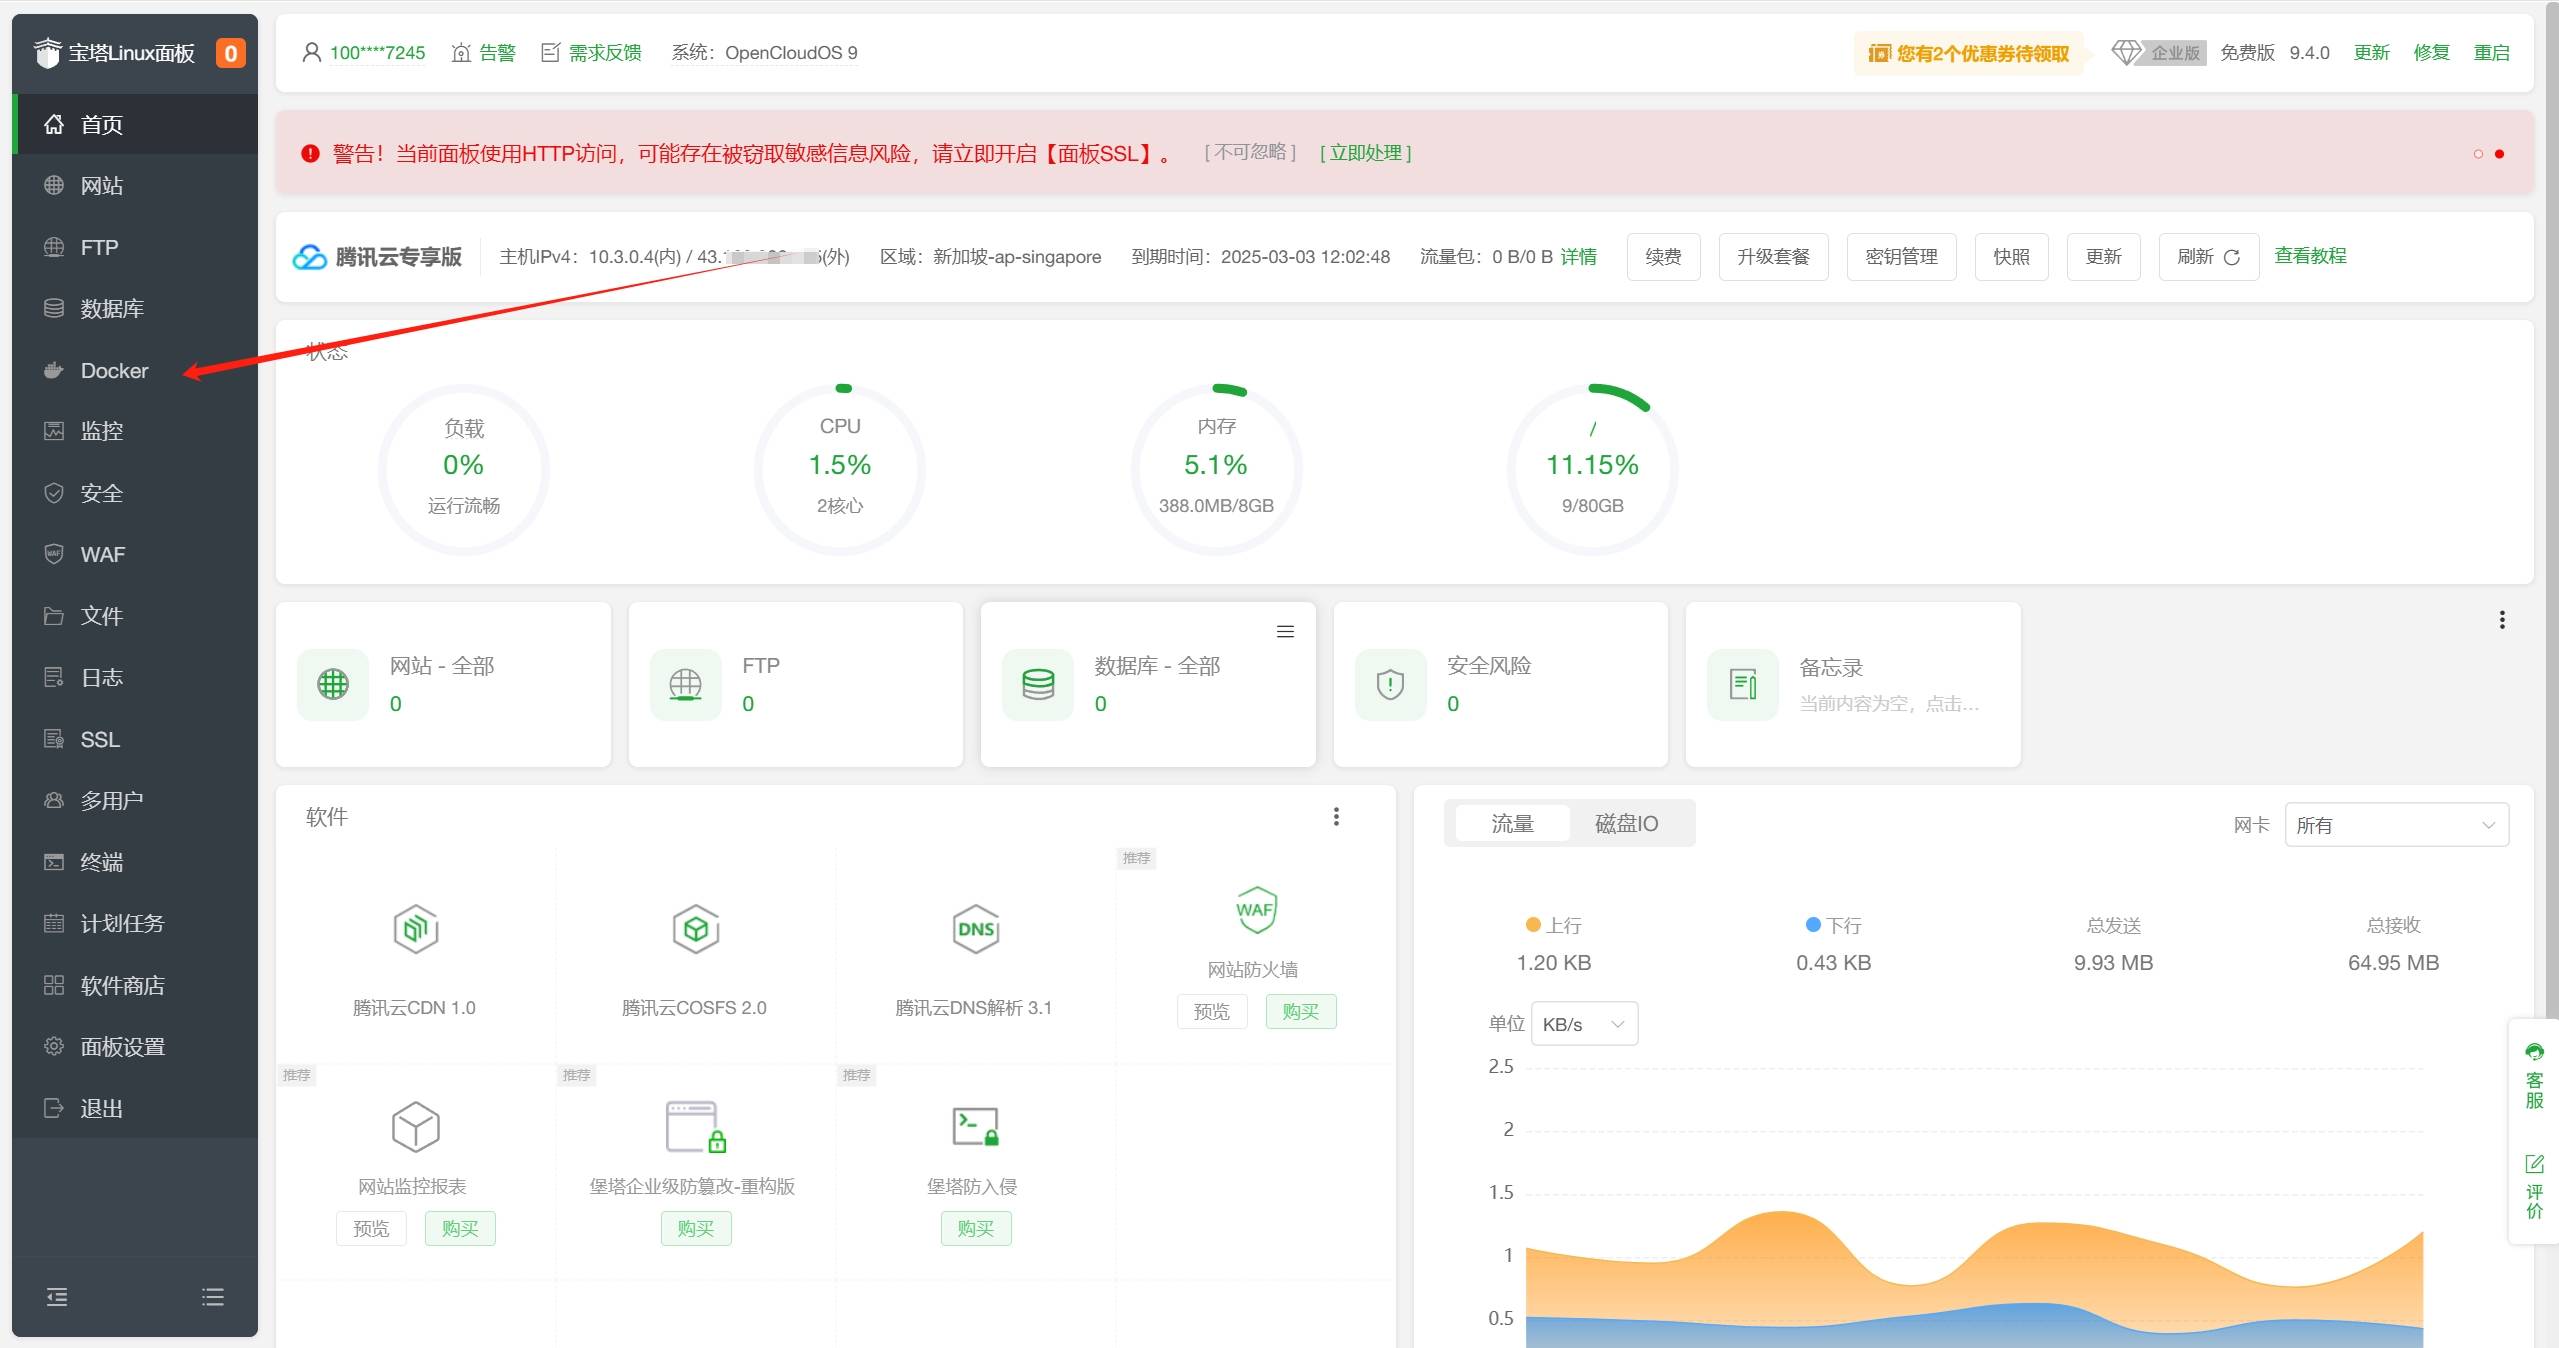
- 首次使用Docker需要先安装Docker,点击
安装。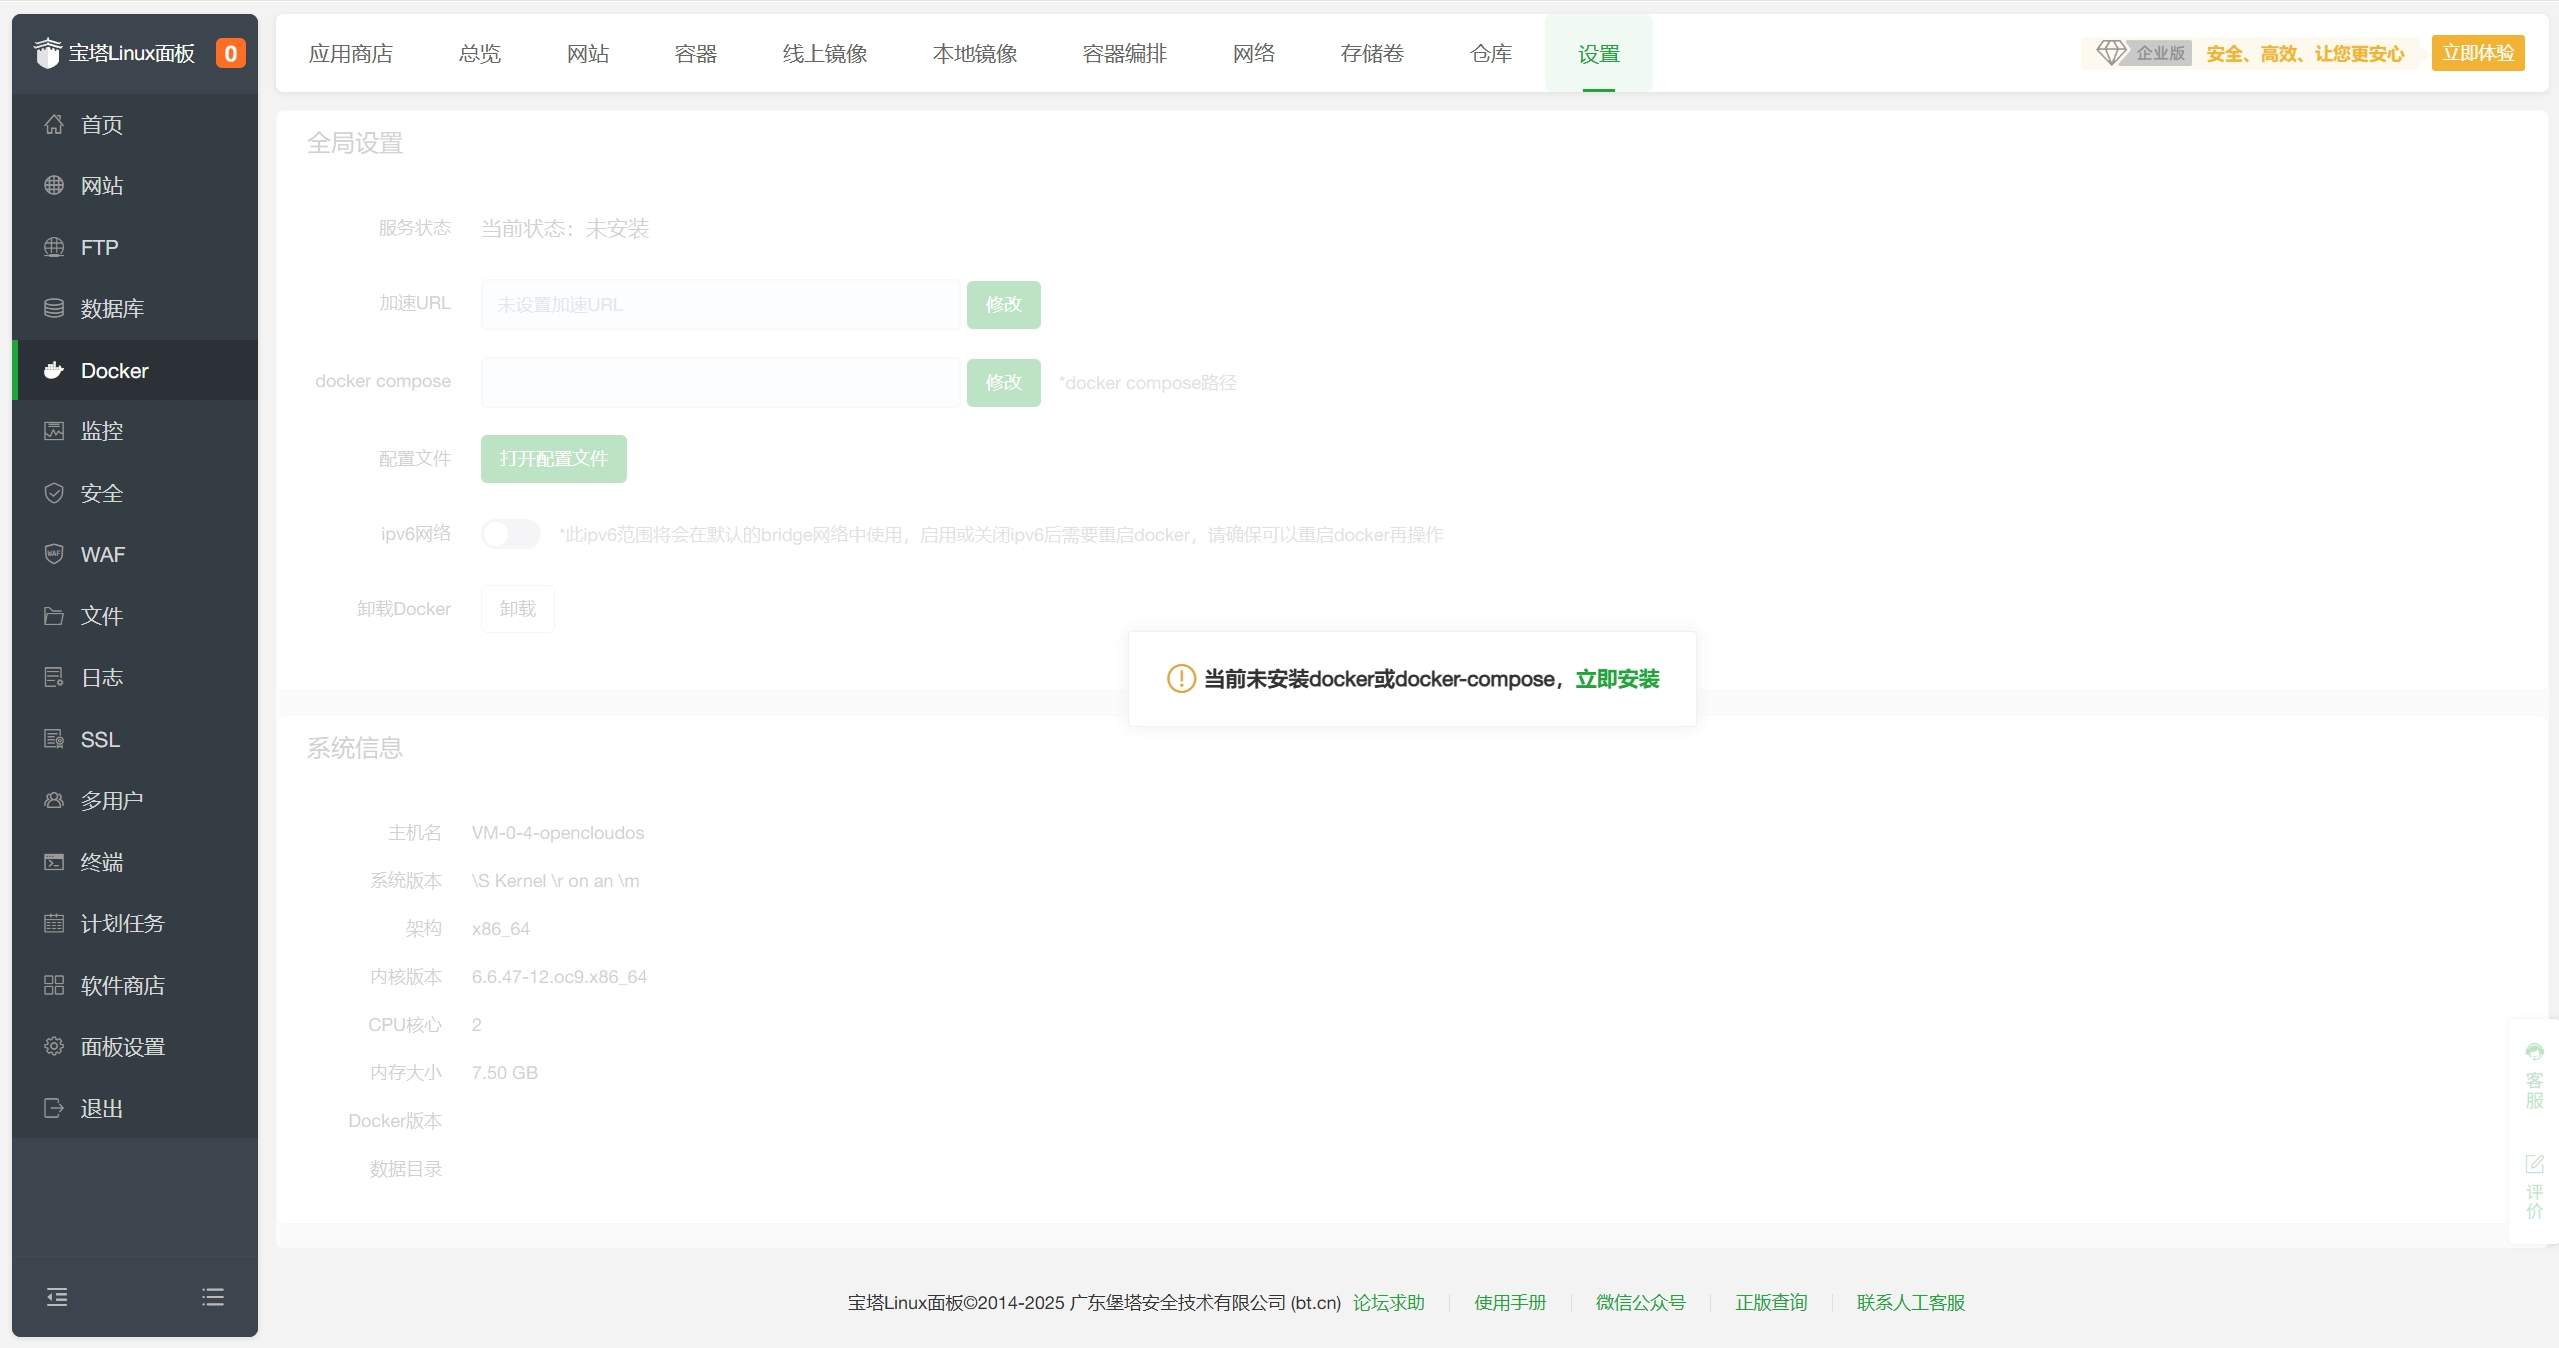
- 在Docker-应用商店-AI/大模型分类中找到Ollama,点击
安装。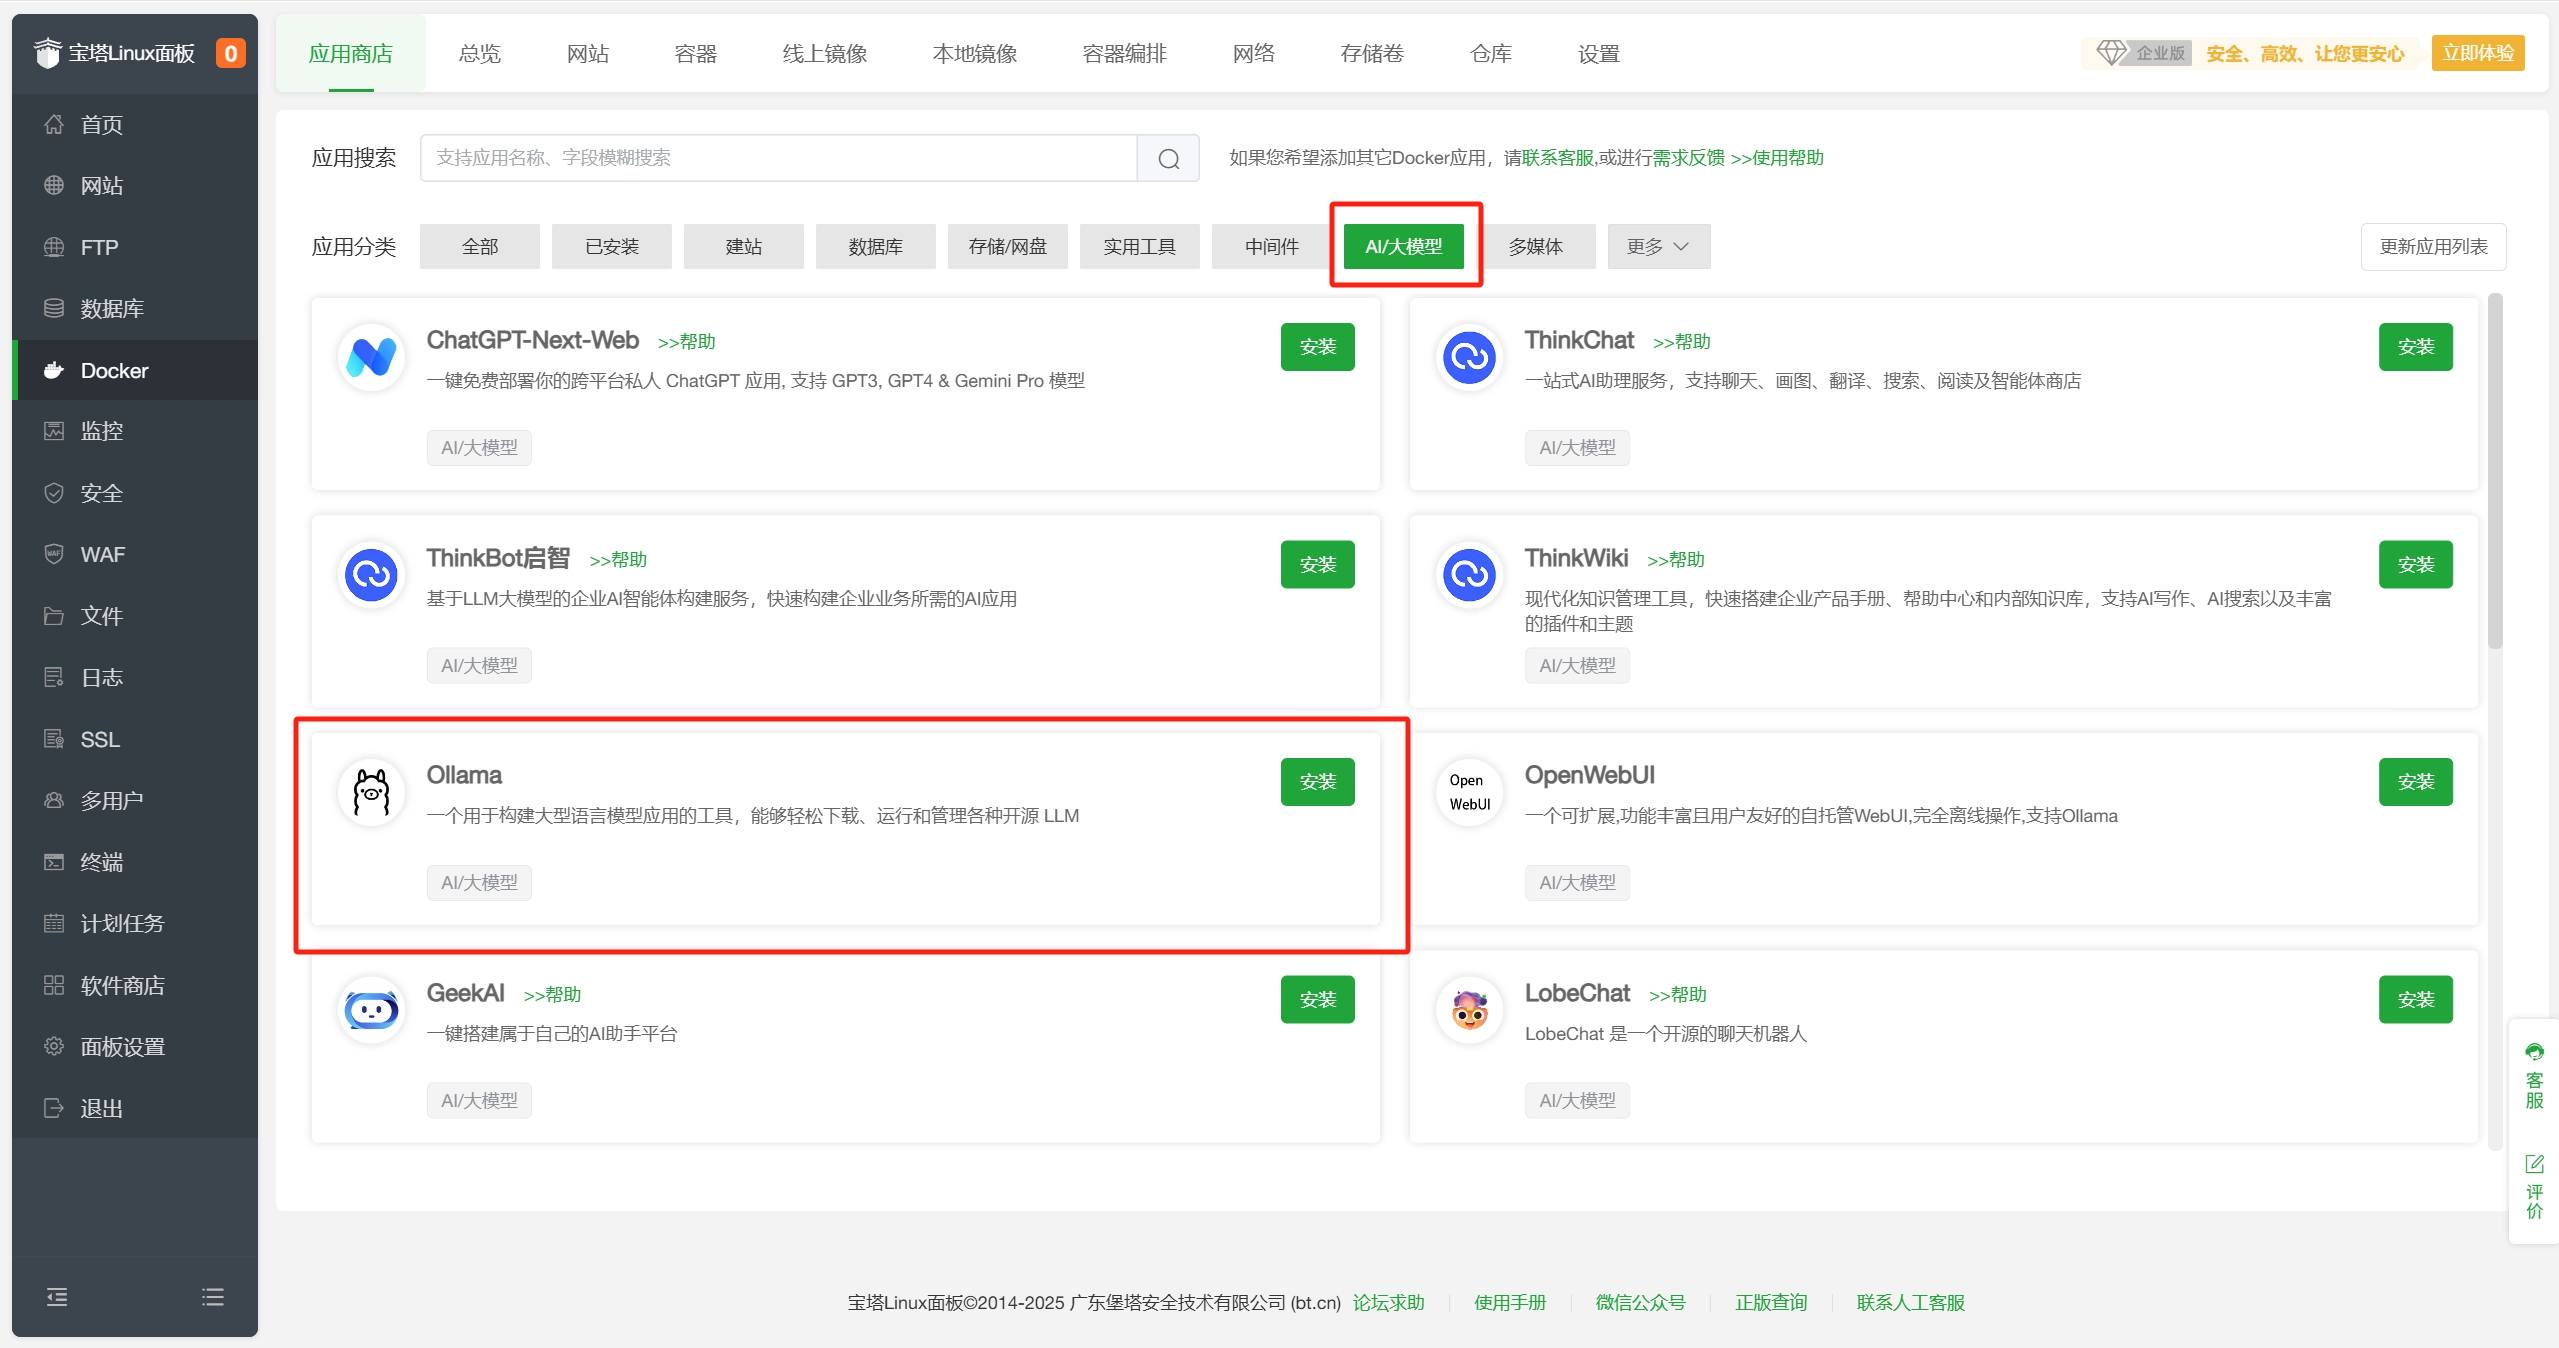
- 配置默认即可,点击
确定。
- 等待安装完成,状态变为
运行中。 如您需要使用NVIDIA GPU加速,请参考文末的使用NVIDIA GPU加速配置完成后再继续。
 - 在
宝塔面板-Docker-容器界面中找到Ollama容器,点击终端。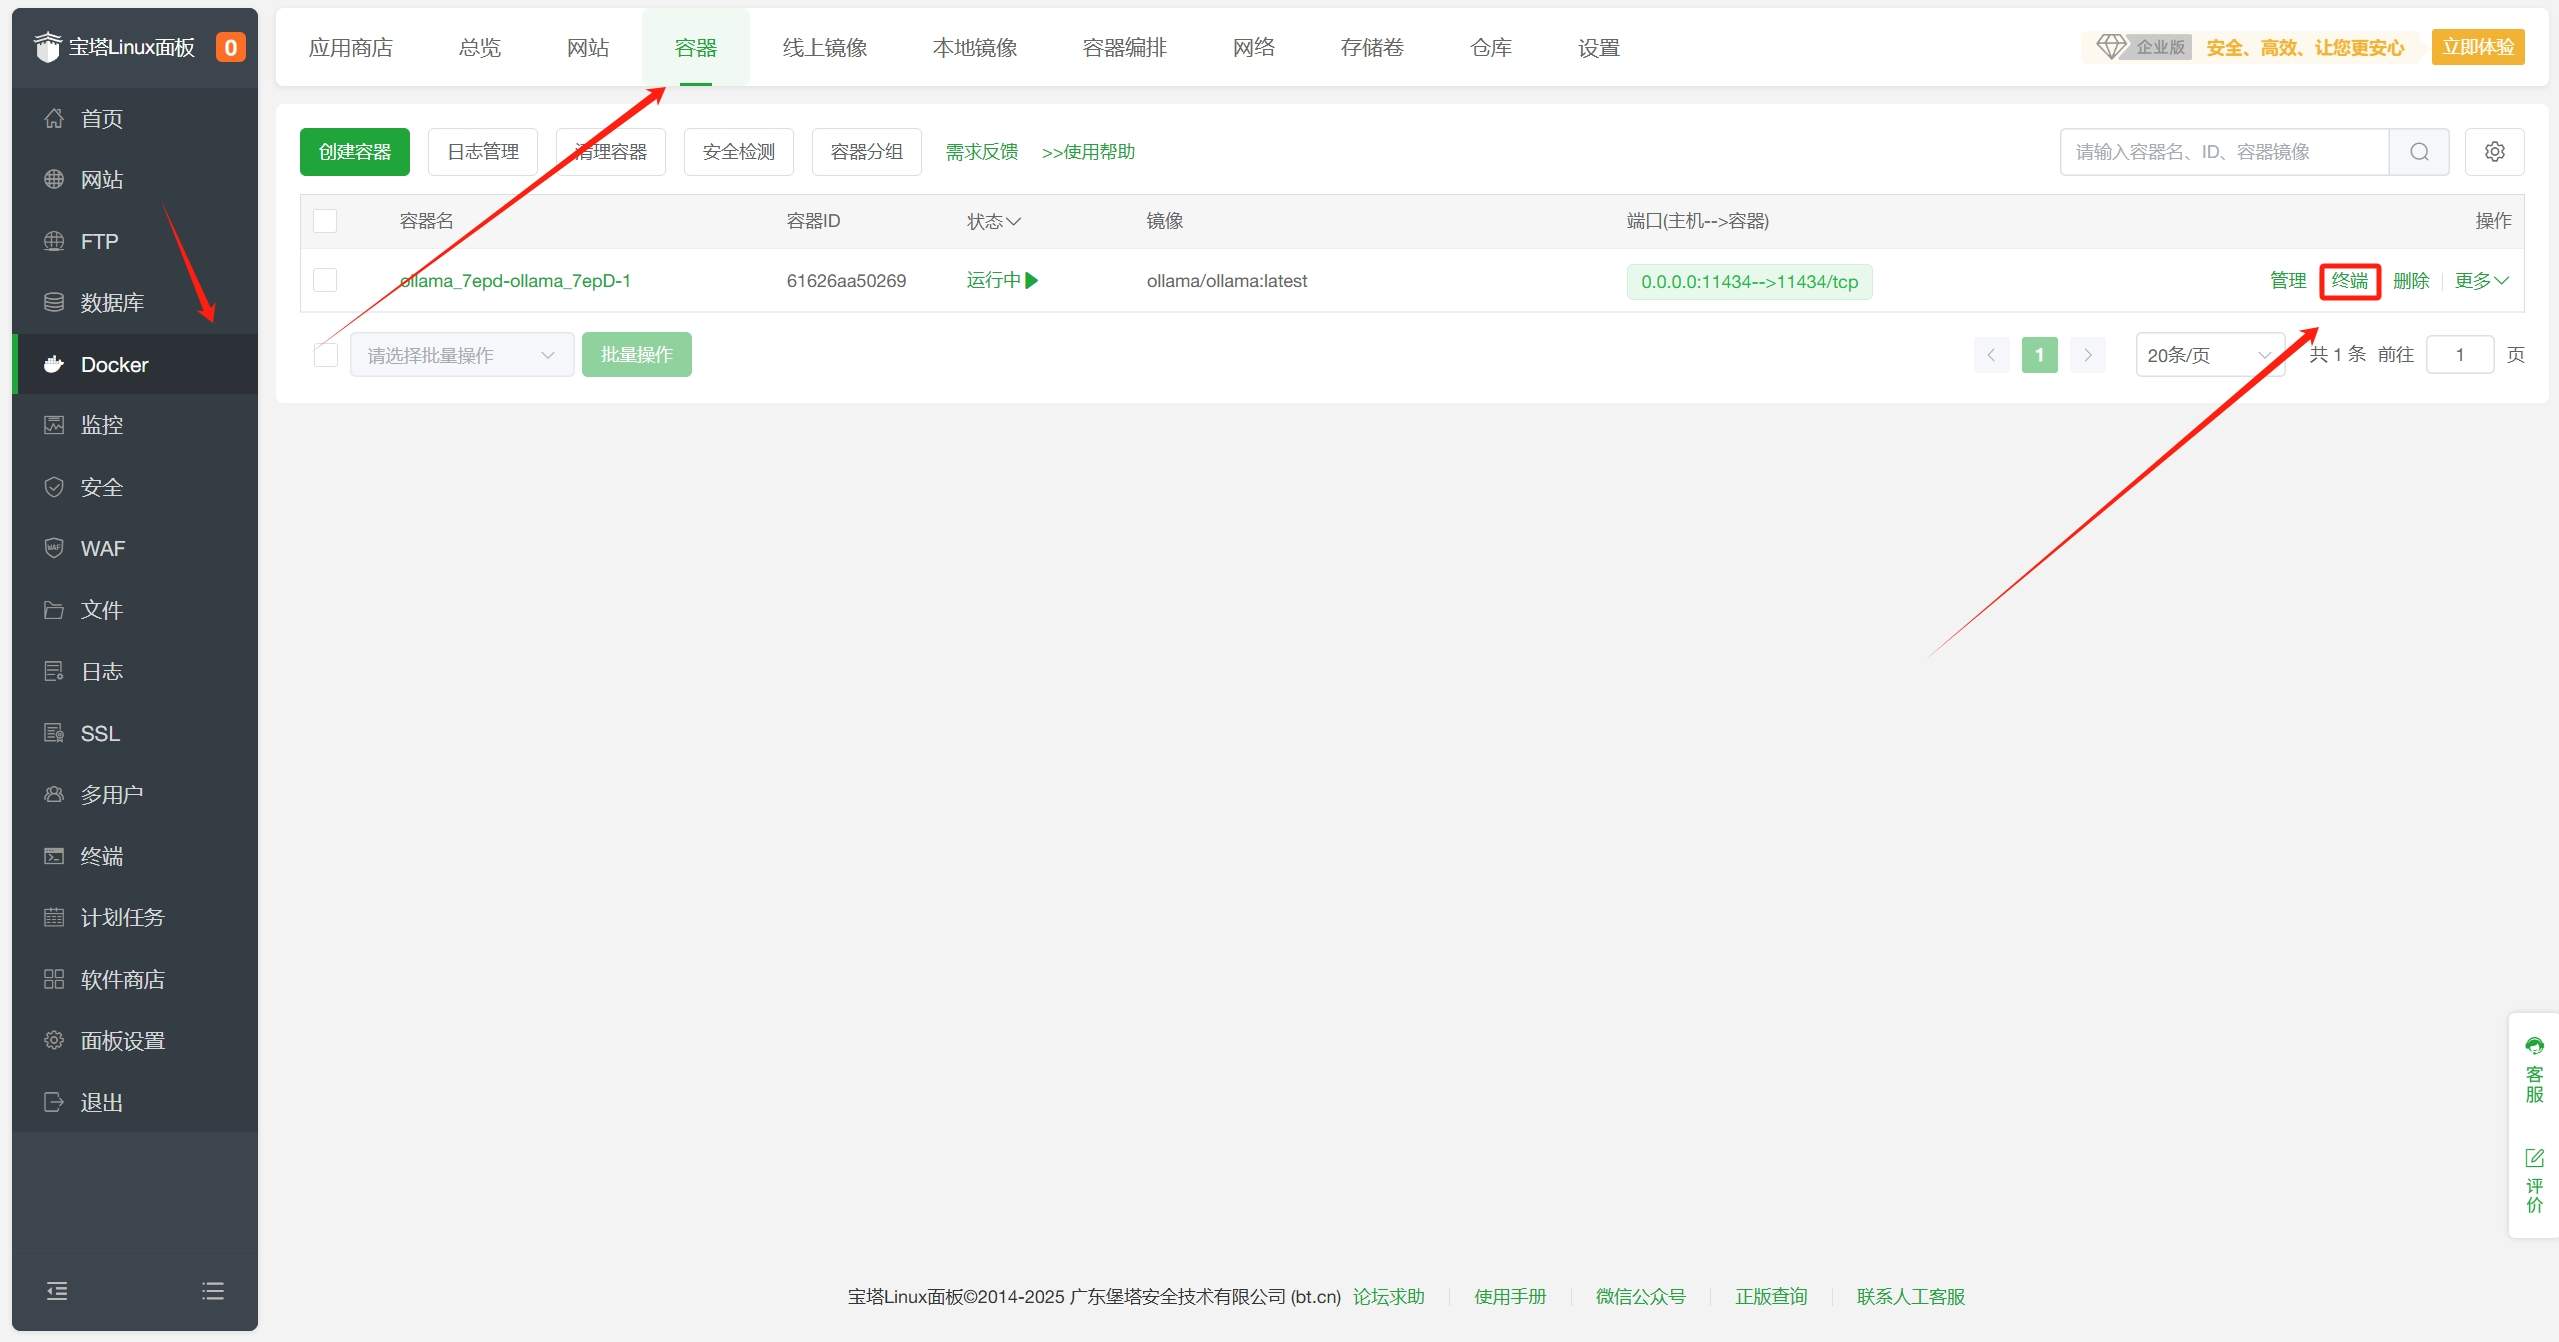
- 在弹出
shell类型选择bash,点击确认。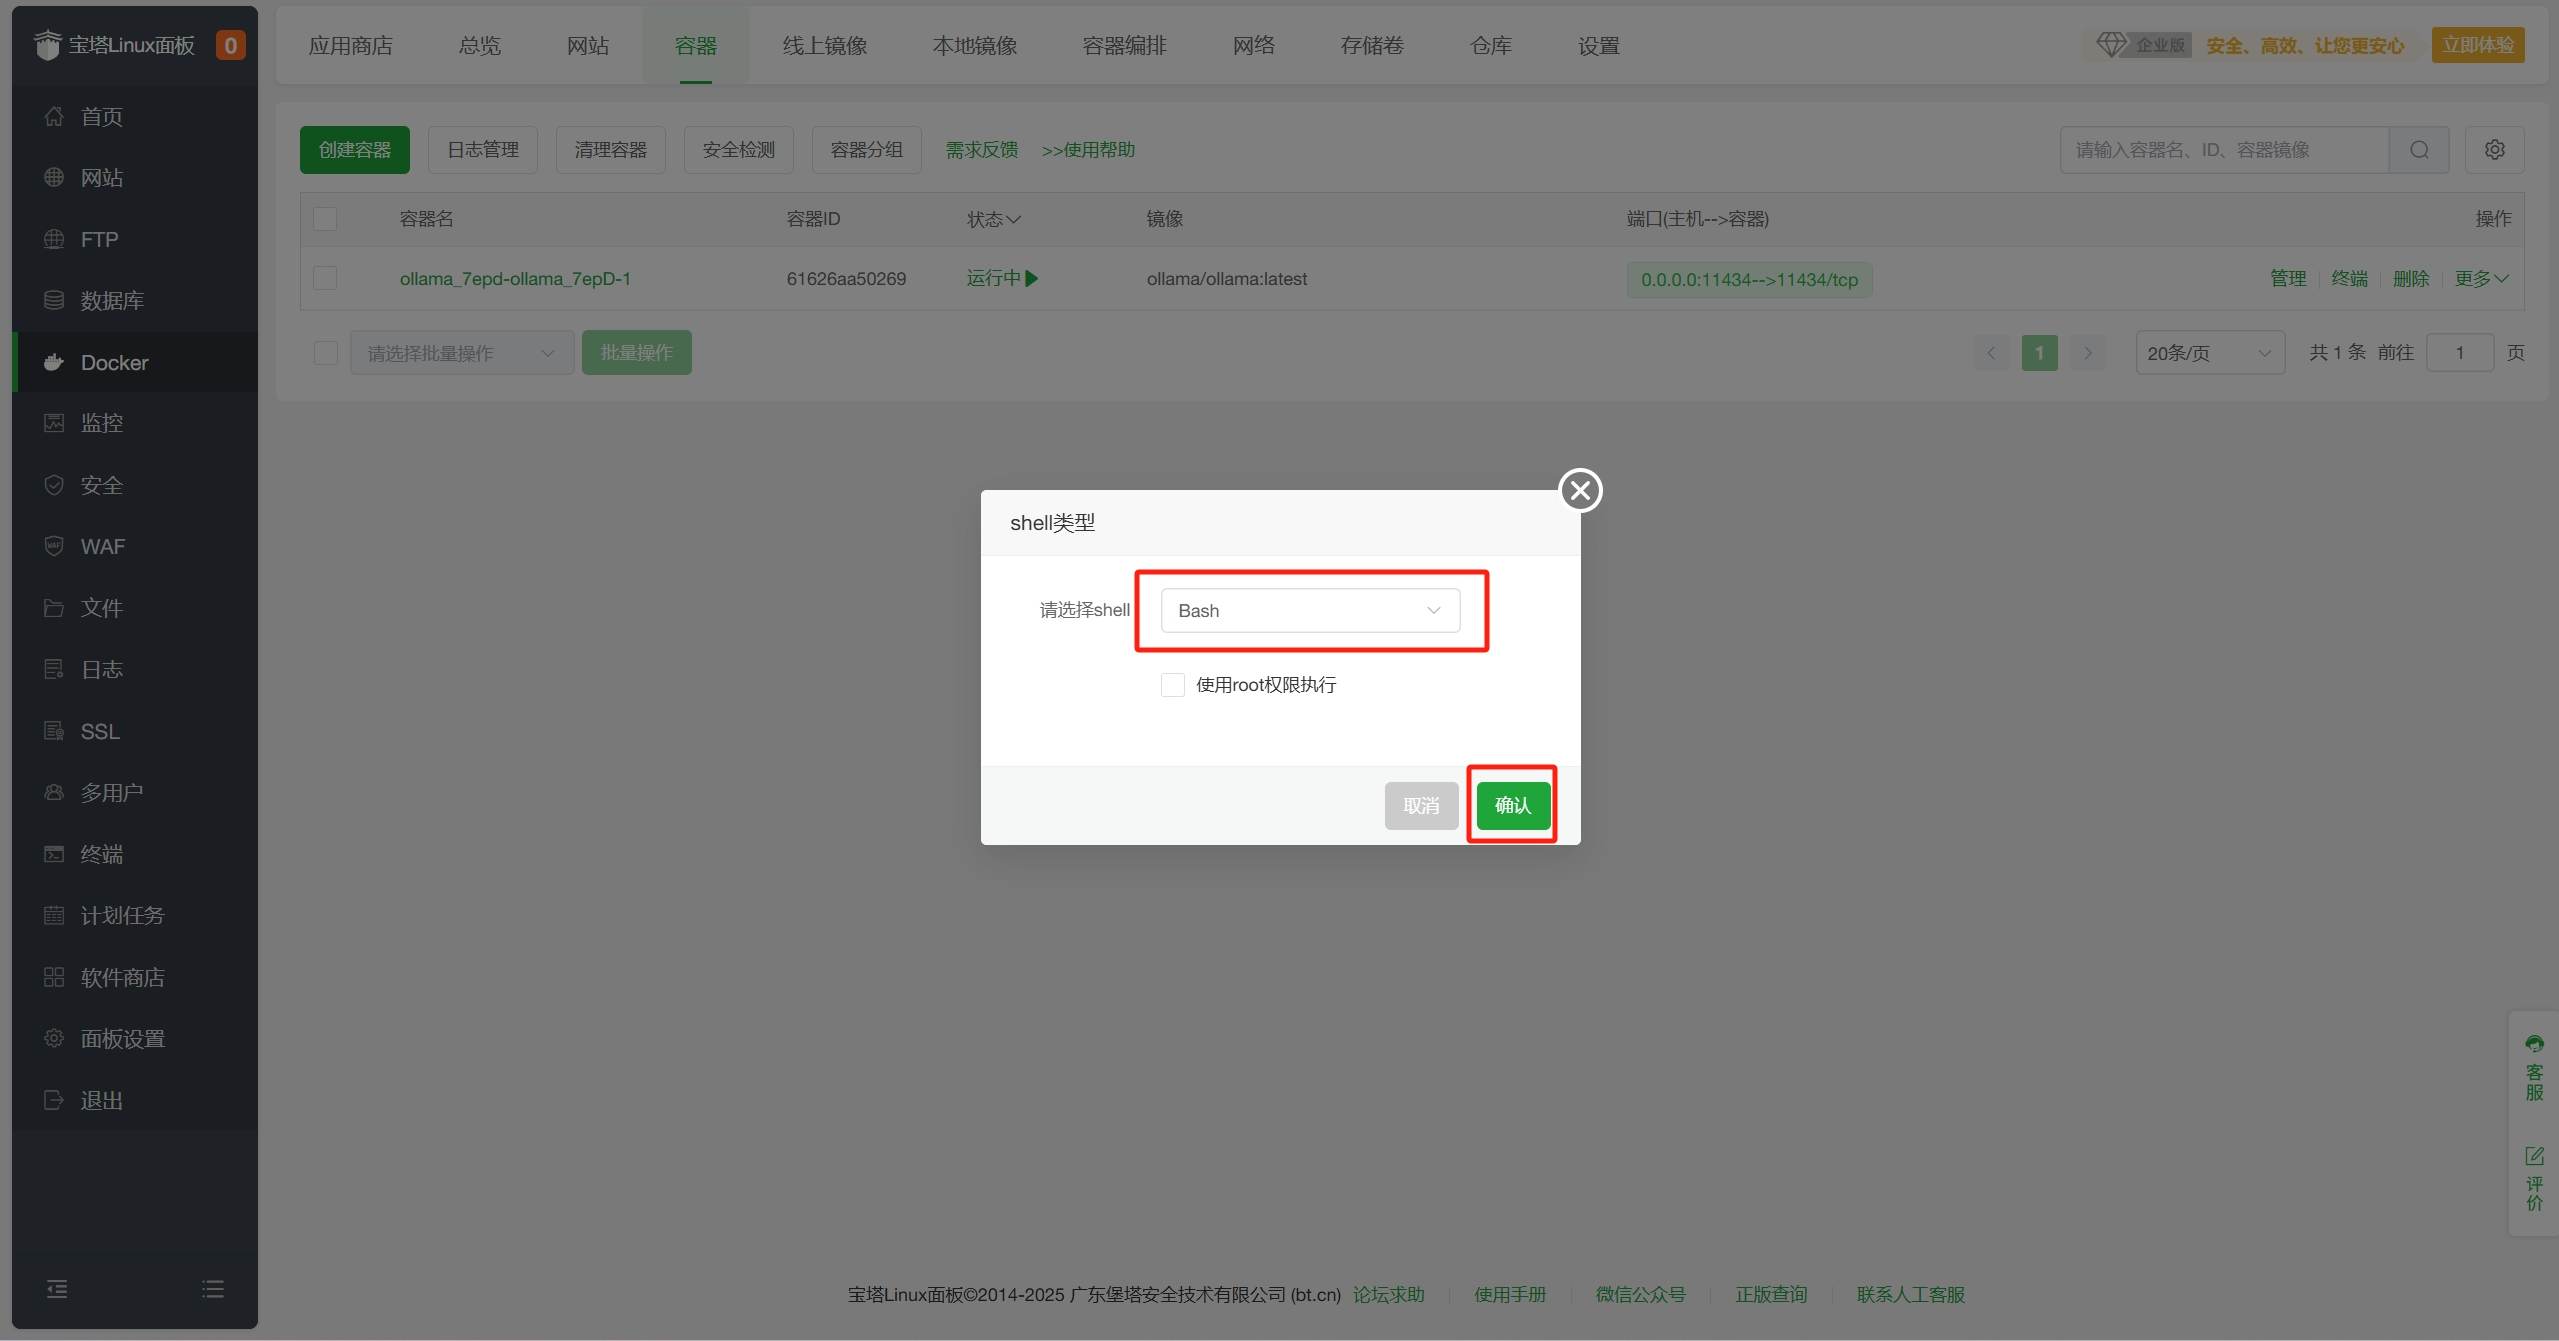
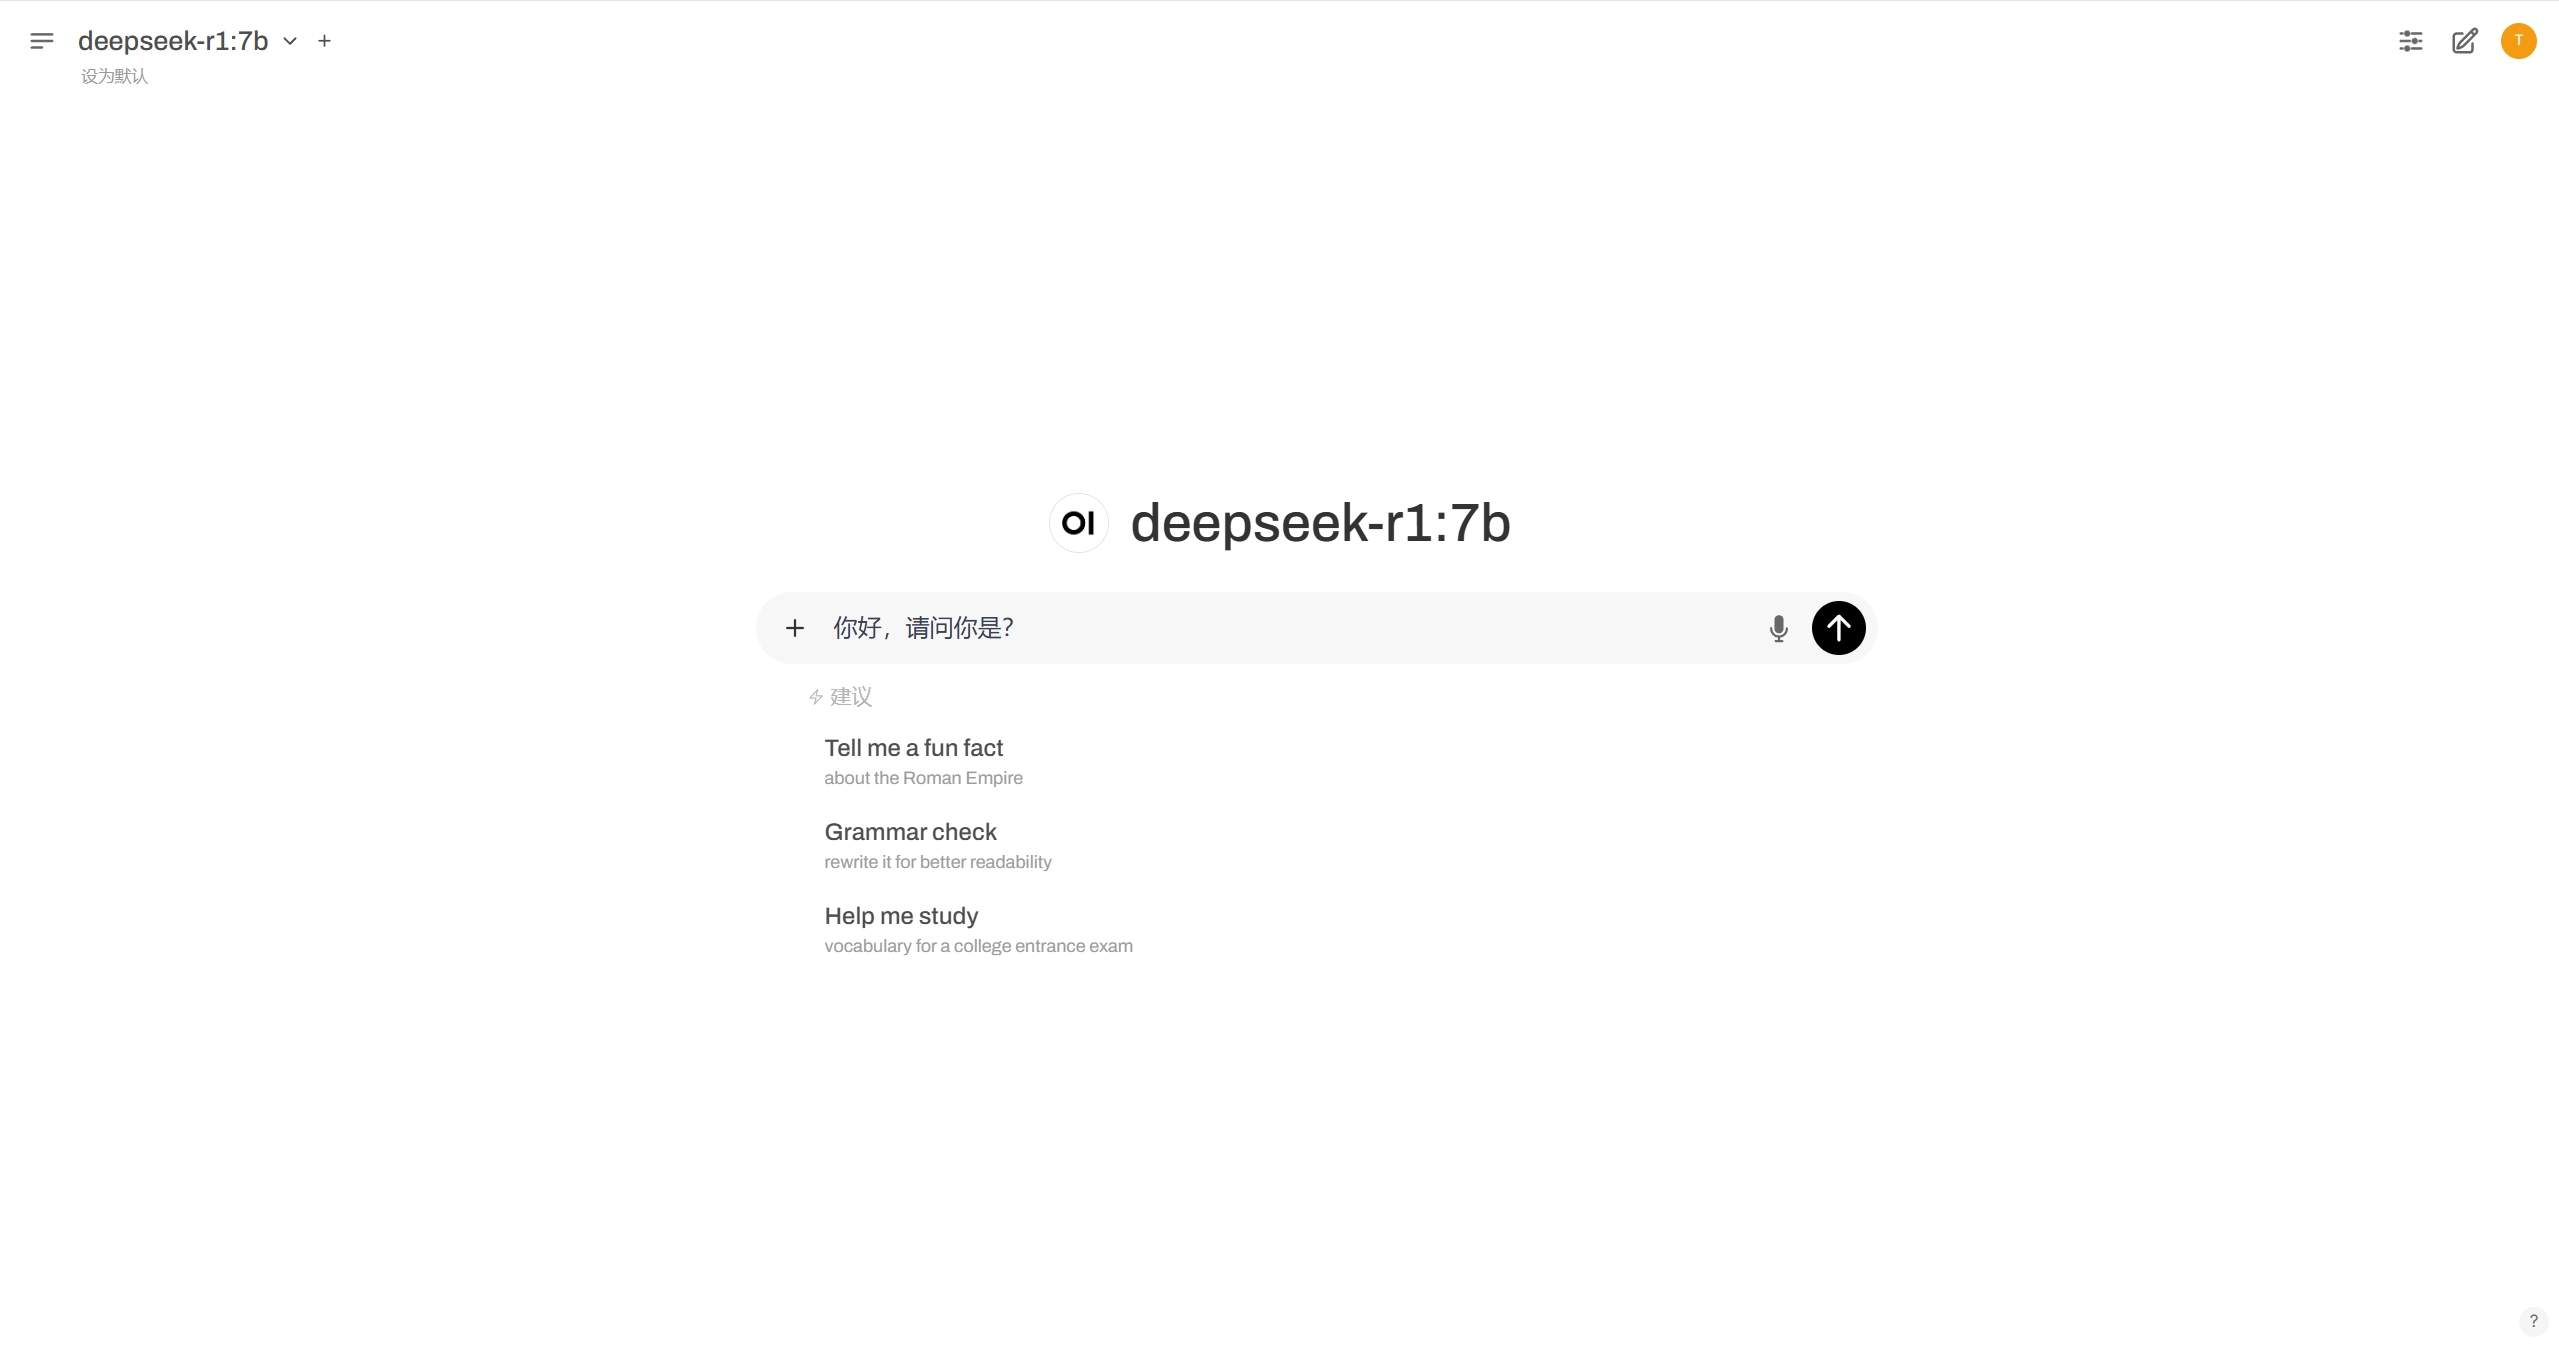
- 在终端界面中输入
ollama run deepseek-r1:1.5b,回车运行DeepSeek-R1模型。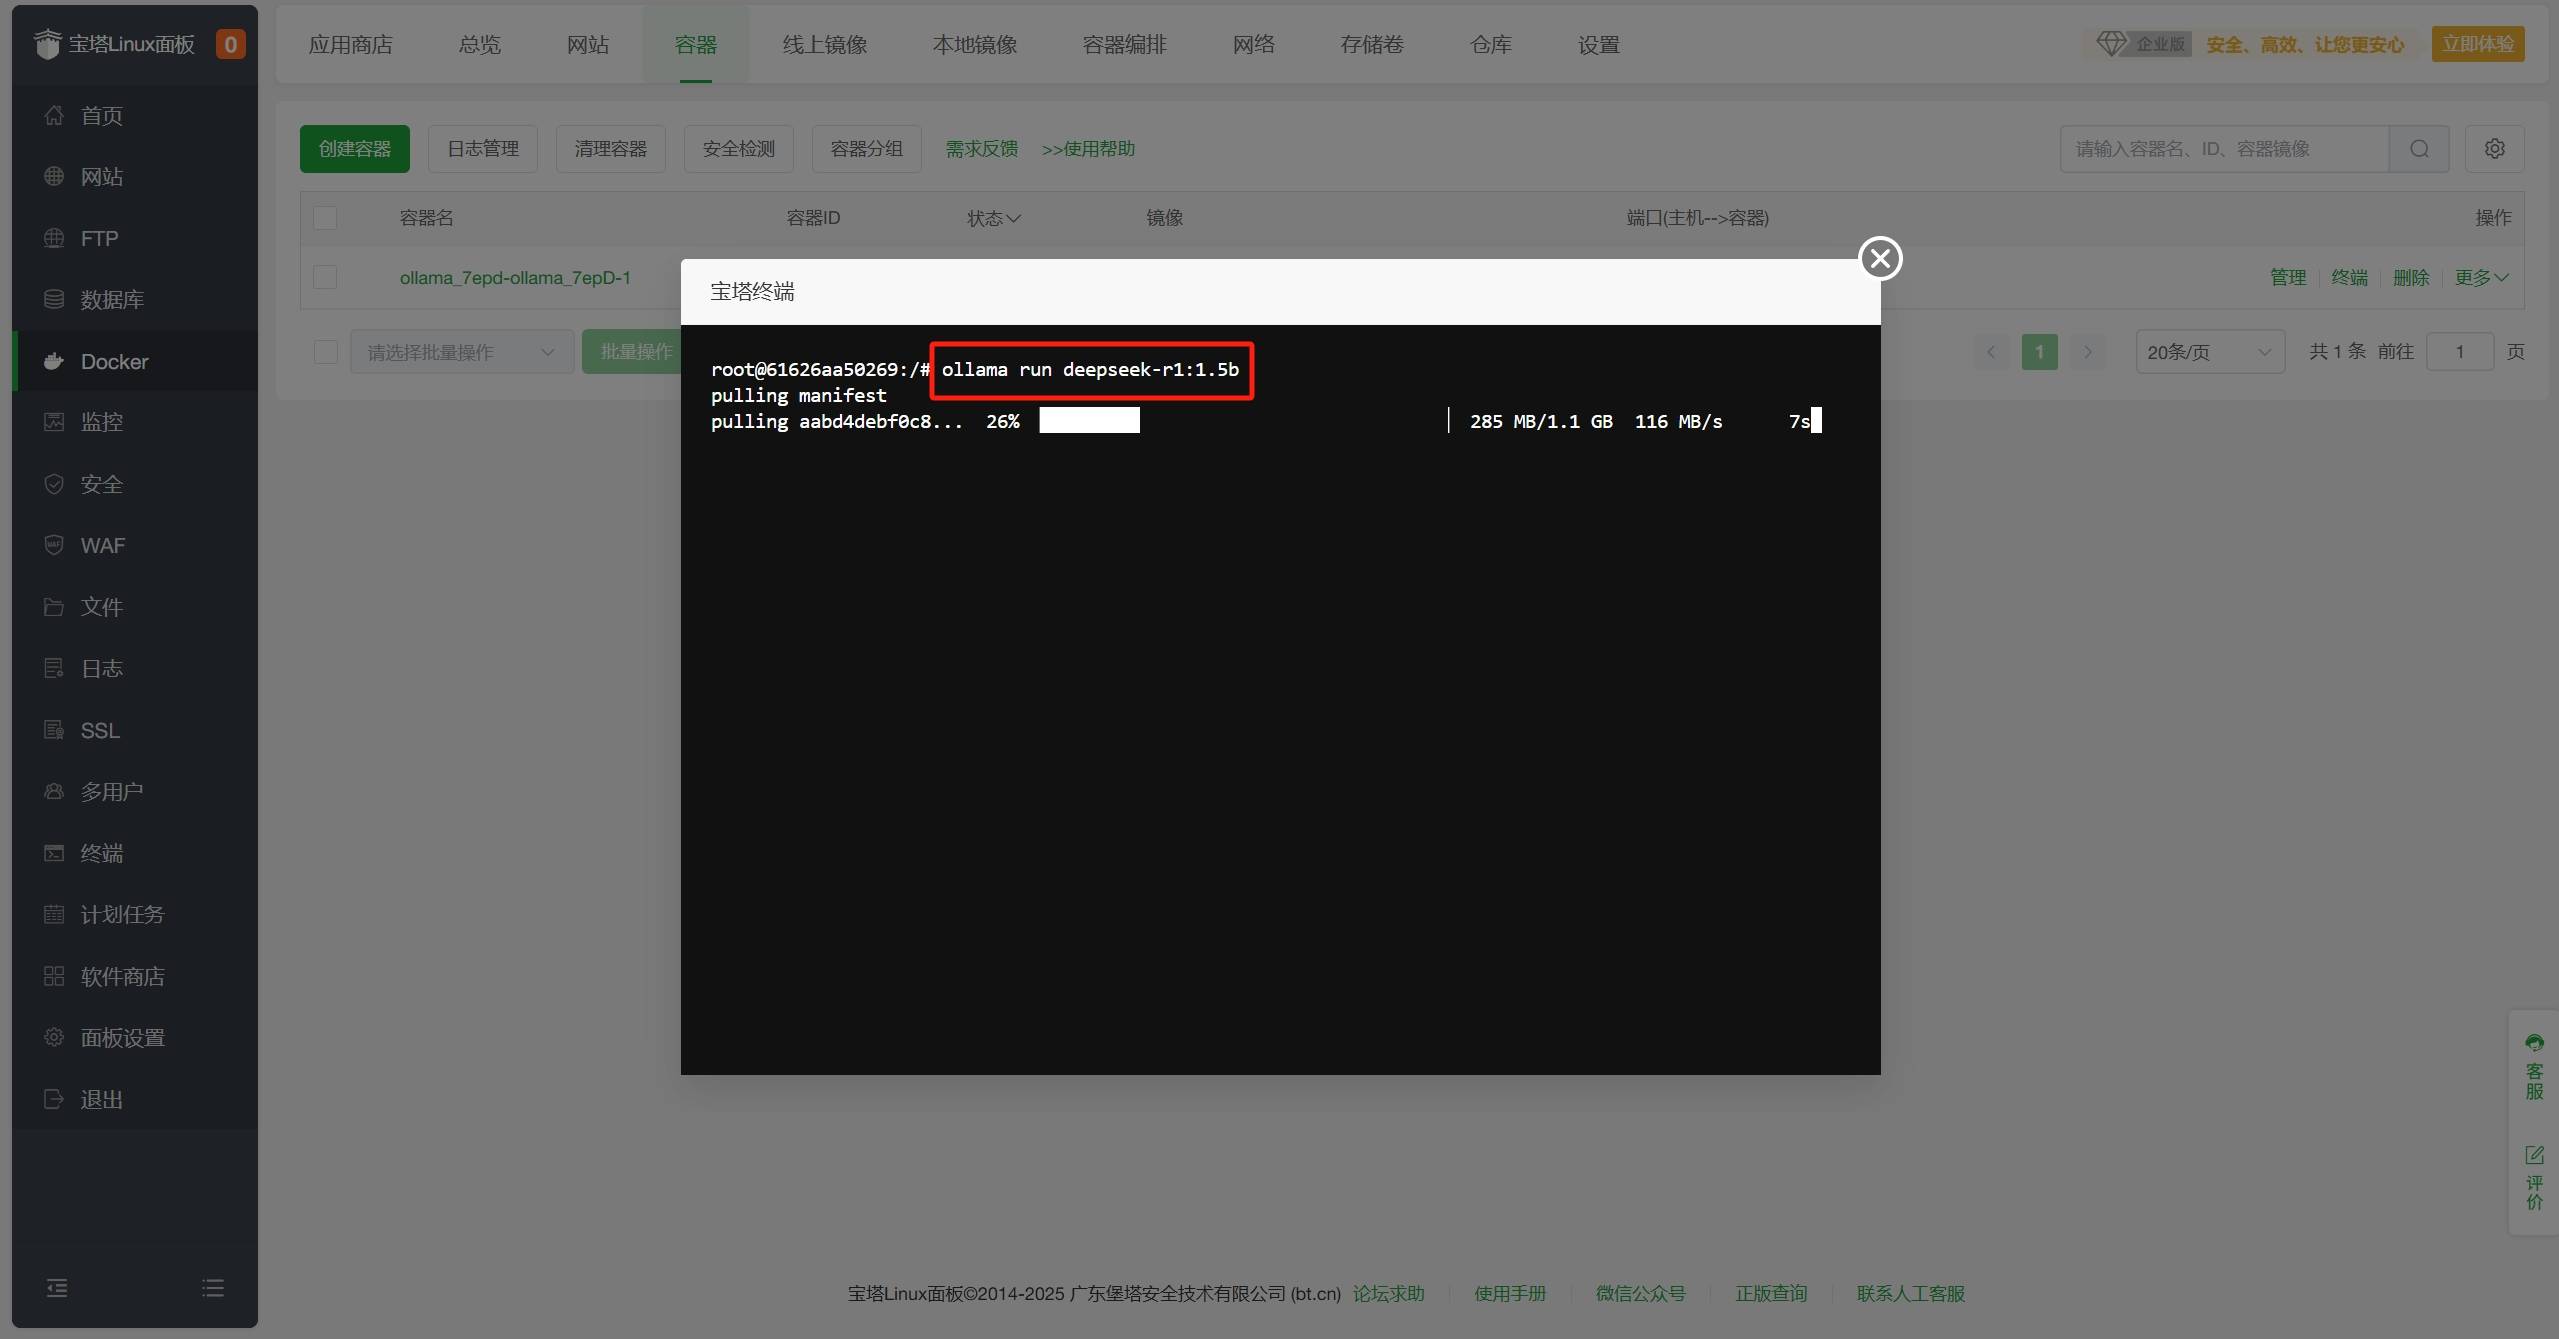 DeepSeek-R1模型有多个版本,可以根据需要选择不同版本,例如
ollama run deepseek-r1:671b,详情如下(模型参数越大,需要配置越高):
# DeepSeek-R1
ollama run deepseek-r1:671b
# DeepSeek-R1-Distill-Qwen-1.5B
ollama run deepseek-r1:1.5b
# DeepSeek-R1-Distill-Qwen-7B
ollama run deepseek-r1:7b
# DeepSeek-R1-Distill-Llama-8B
ollama run deepseek-r1:8b
# DeepSeek-R1-Distill-Qwen-14B
ollama run deepseek-r1:14b
# DeepSeek-R1-Distill-Qwen-32B
ollama run deepseek-r1:32b
# DeepSeek-R1-Distill-Llama-70B
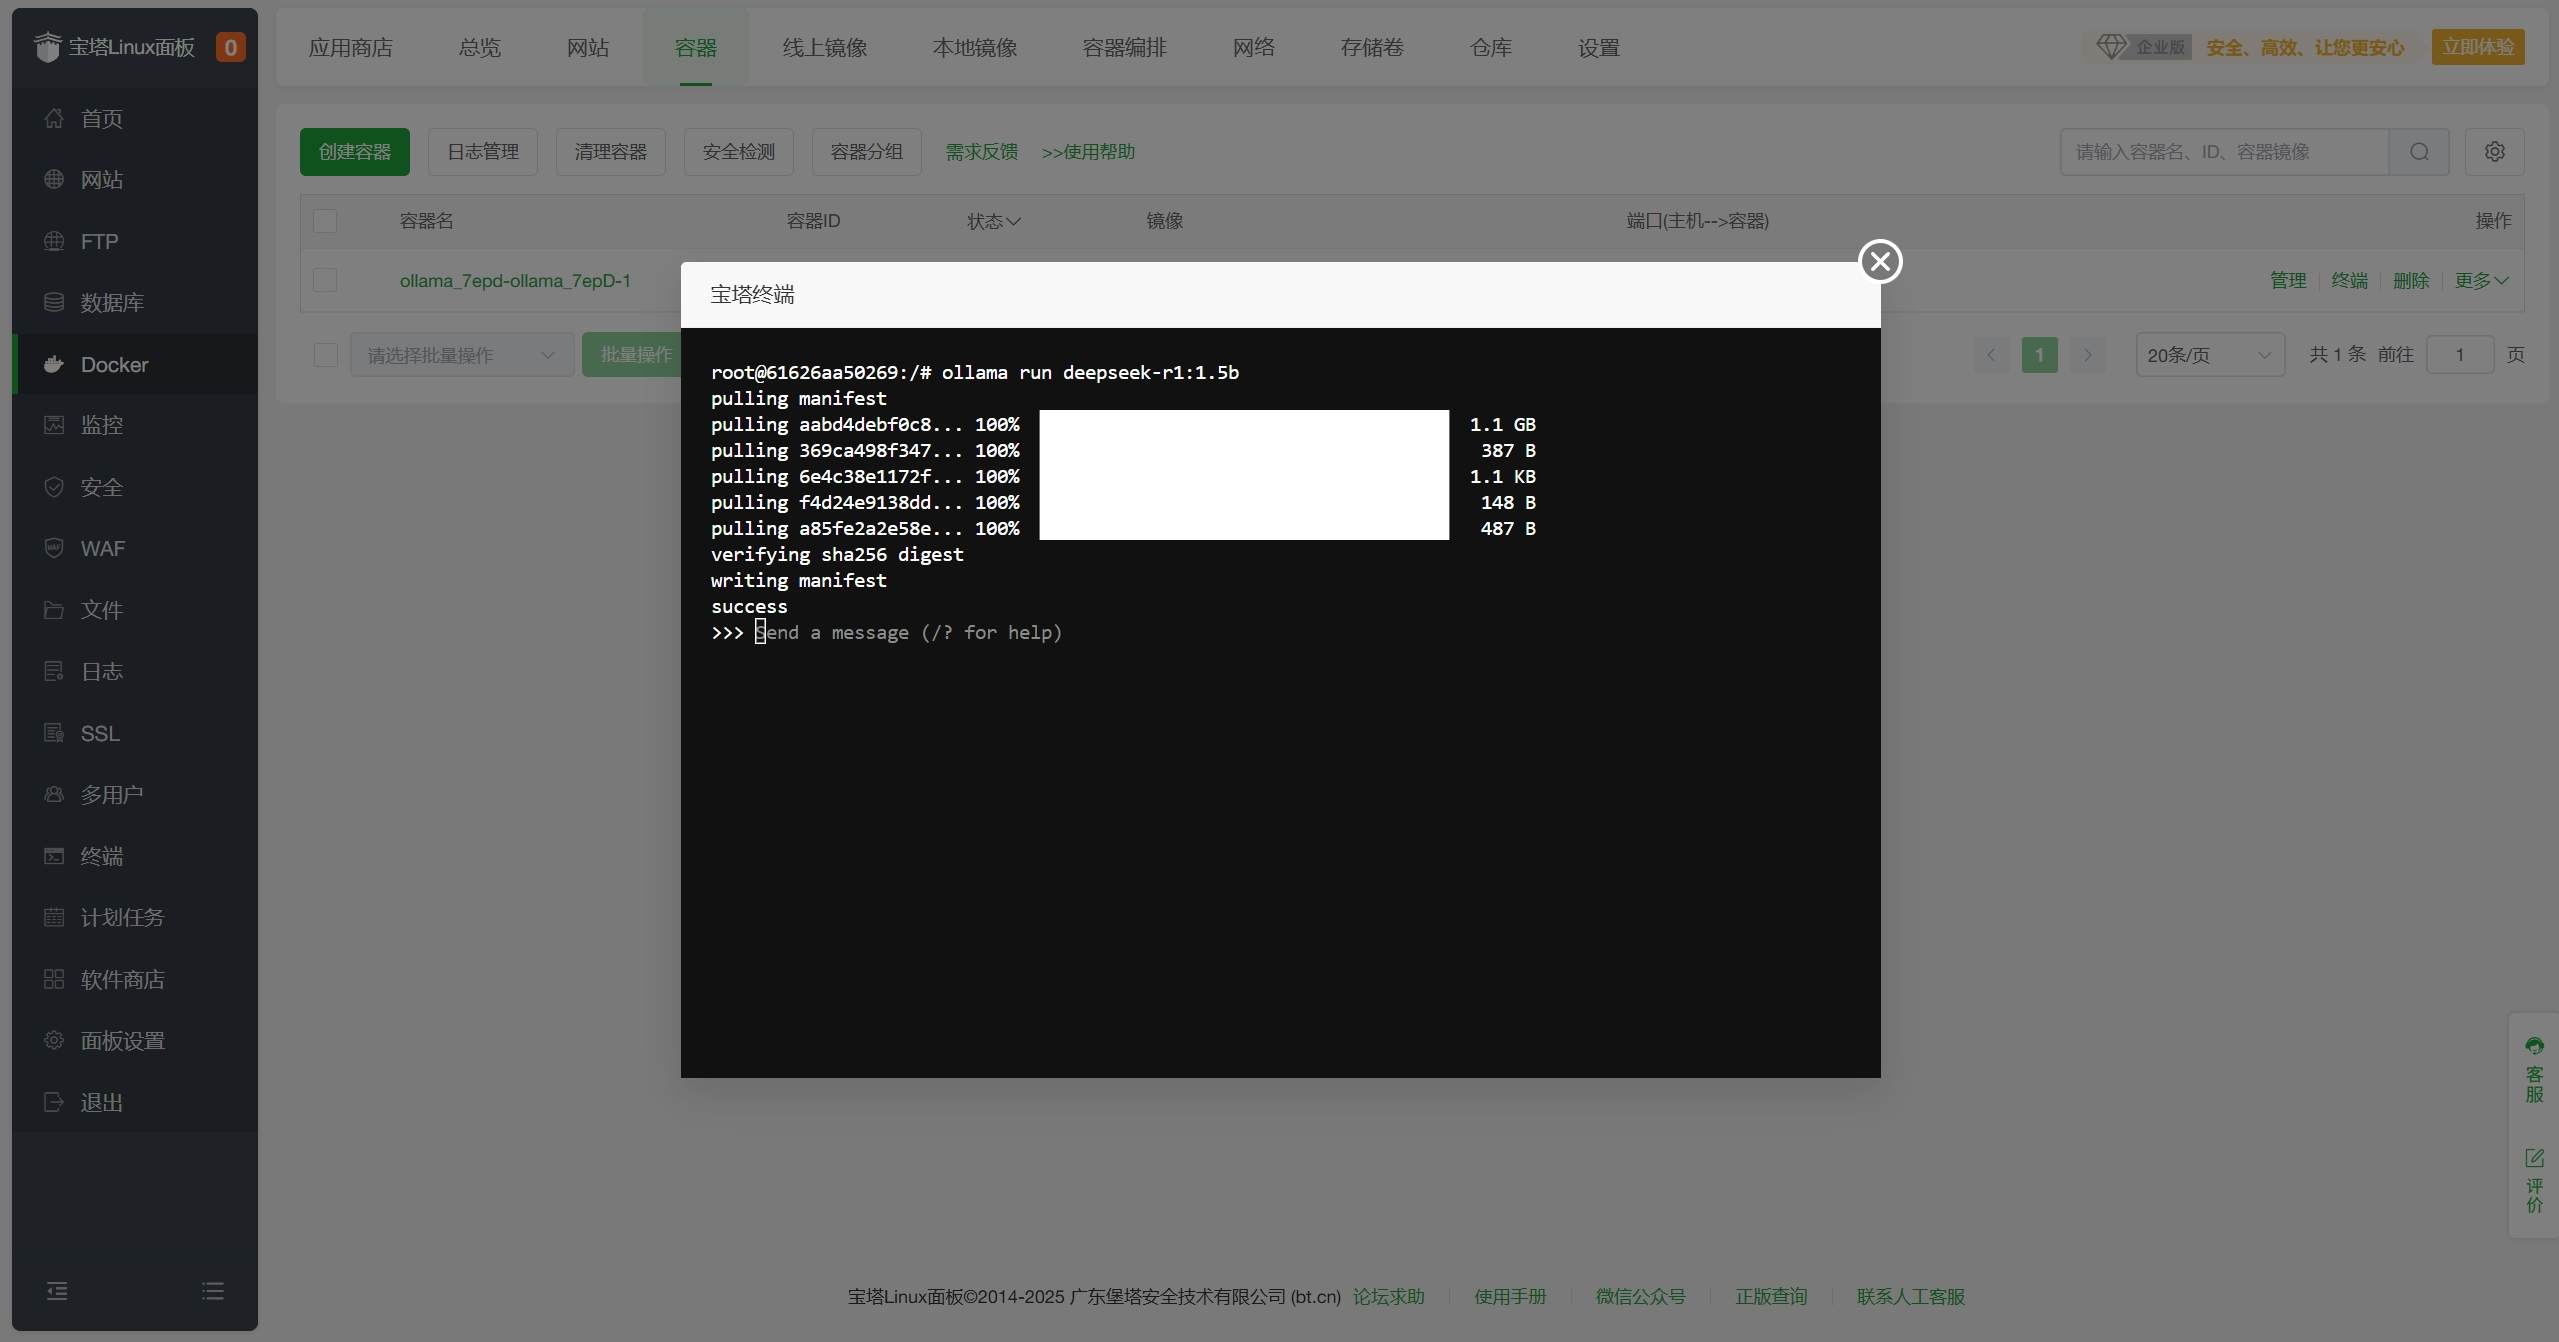
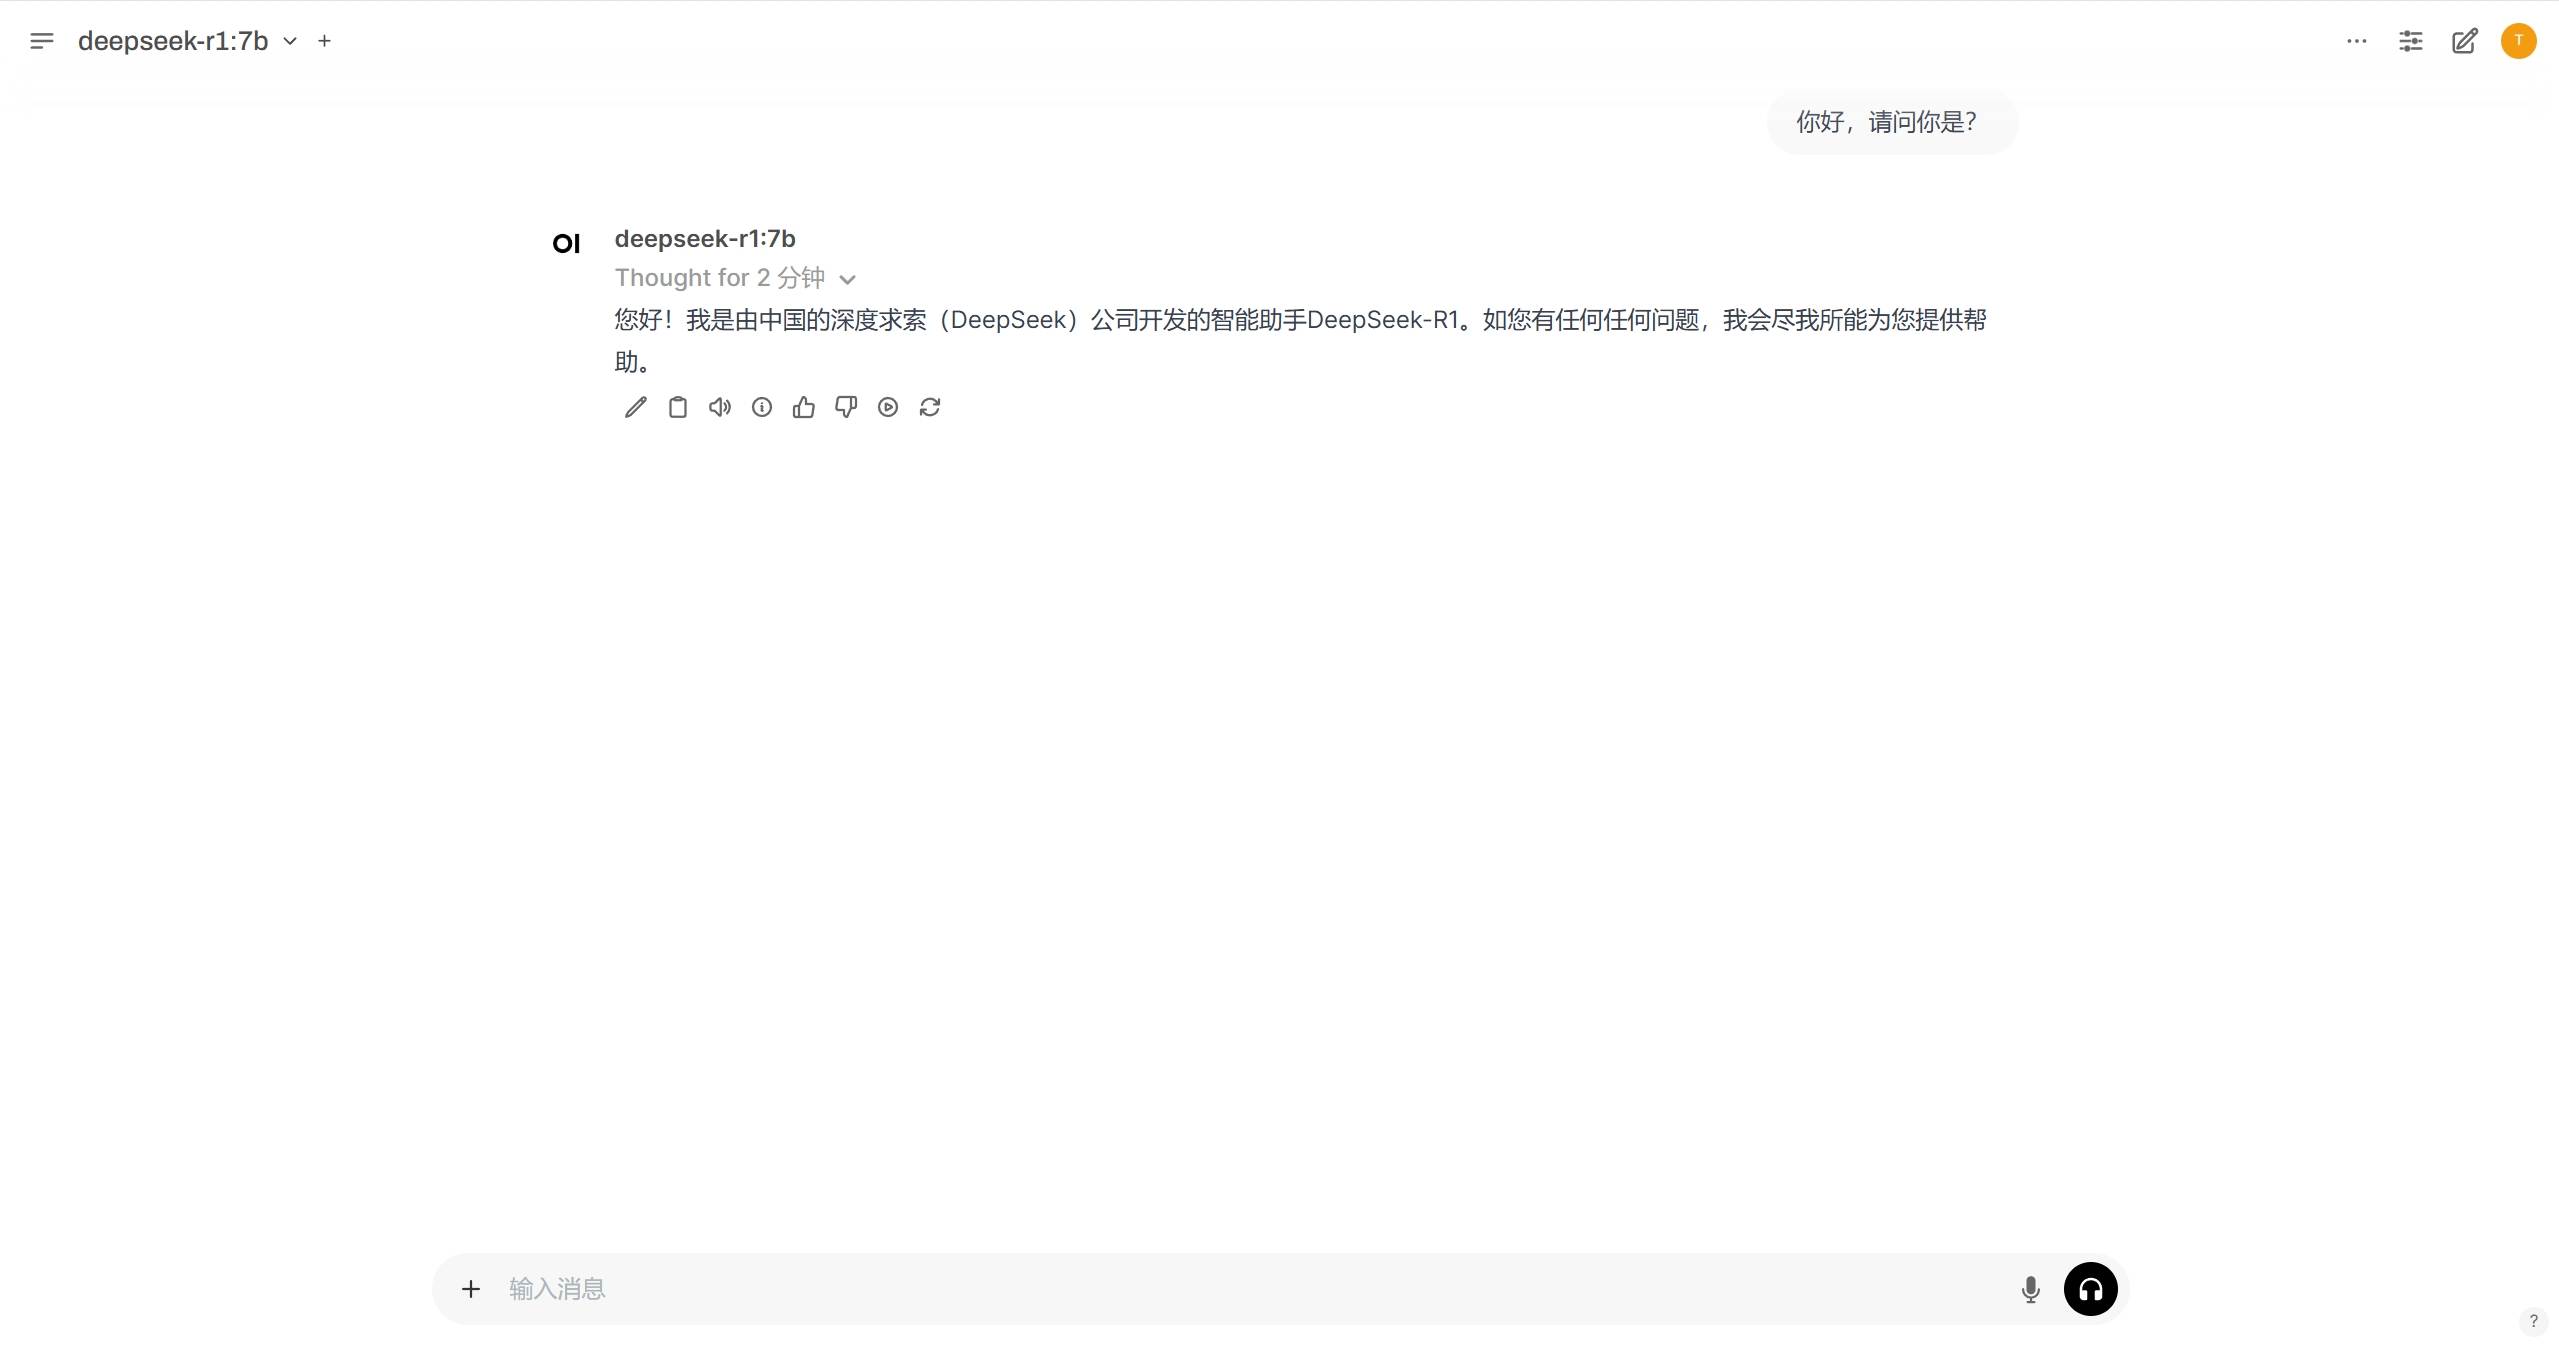
ollama run deepseek-r1:70b- 等待下载并运行,当看到如下提示表示DeepSeek-R1模型运行成功。
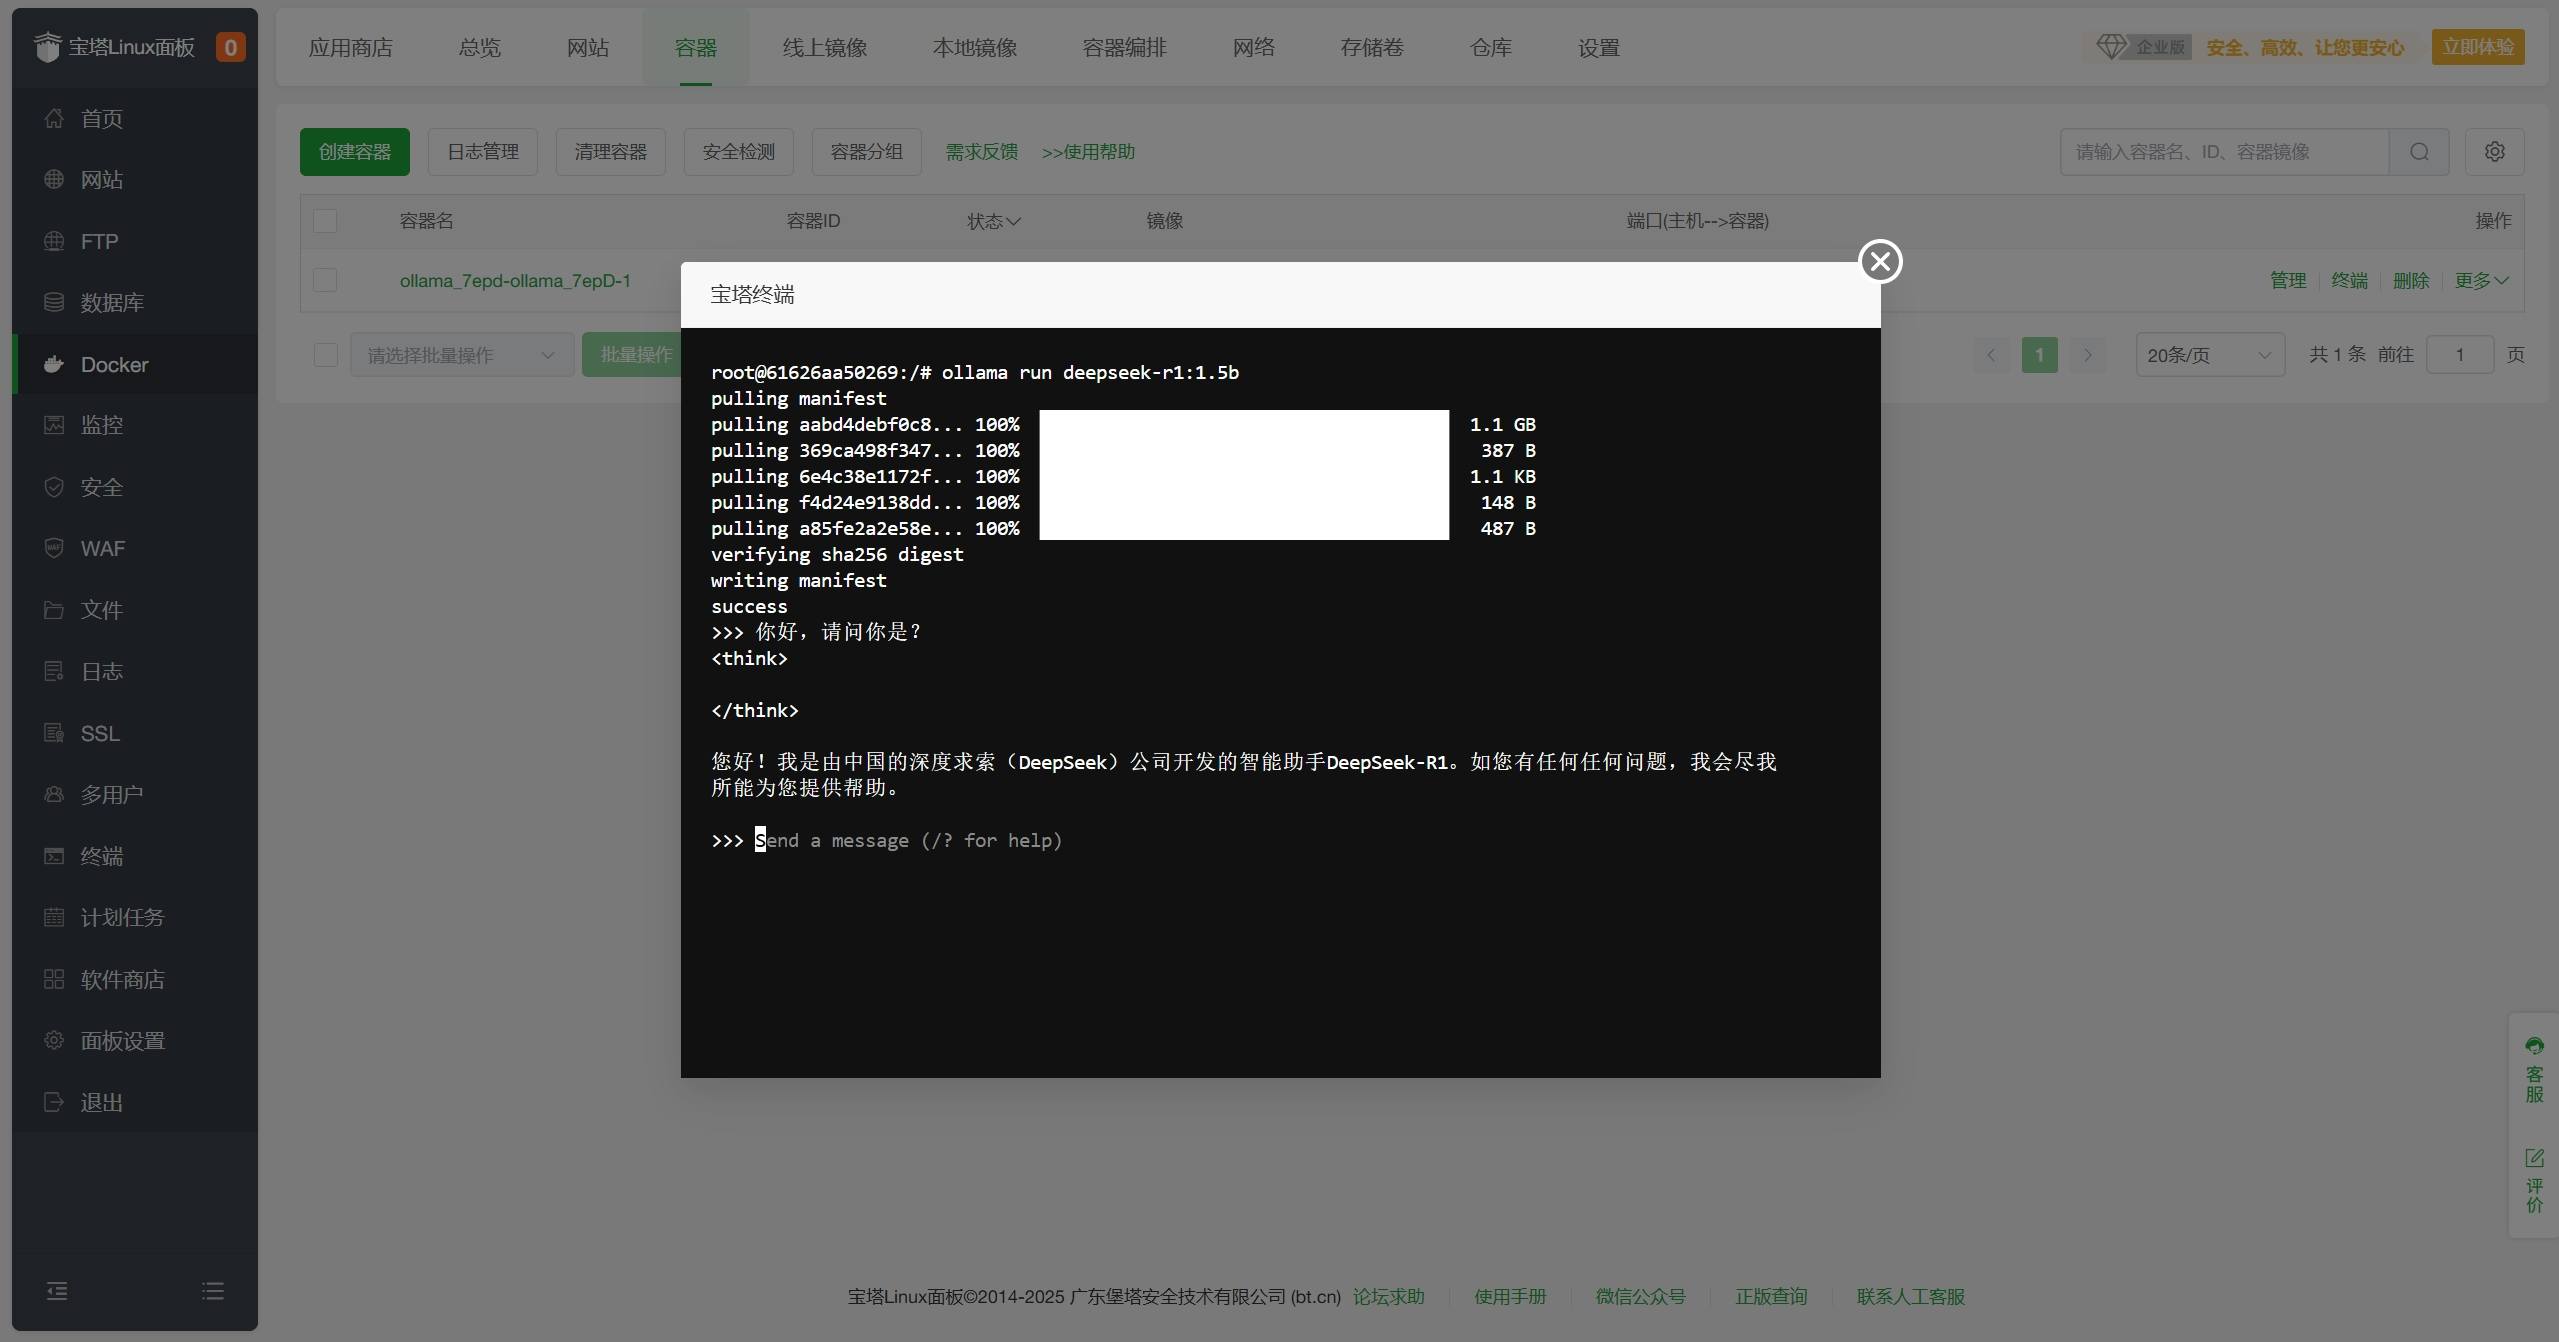
- 你可以在界面中输入文本并回车,开启与DeepSeek-R1模型的对话。
- 你可以在界面中输入
/bye并回车,退出DeepSeek-R1模型。在终端内对话看起来是不是有点麻瓜?别担心,接下来让我们来安装OpenWebUI,在浏览器中更直观地与DeepSeek-R1模型对话 - 在
宝塔面板-Docker-容器界面中找到Ollama容器,复制ollama的容器名称,保存备用。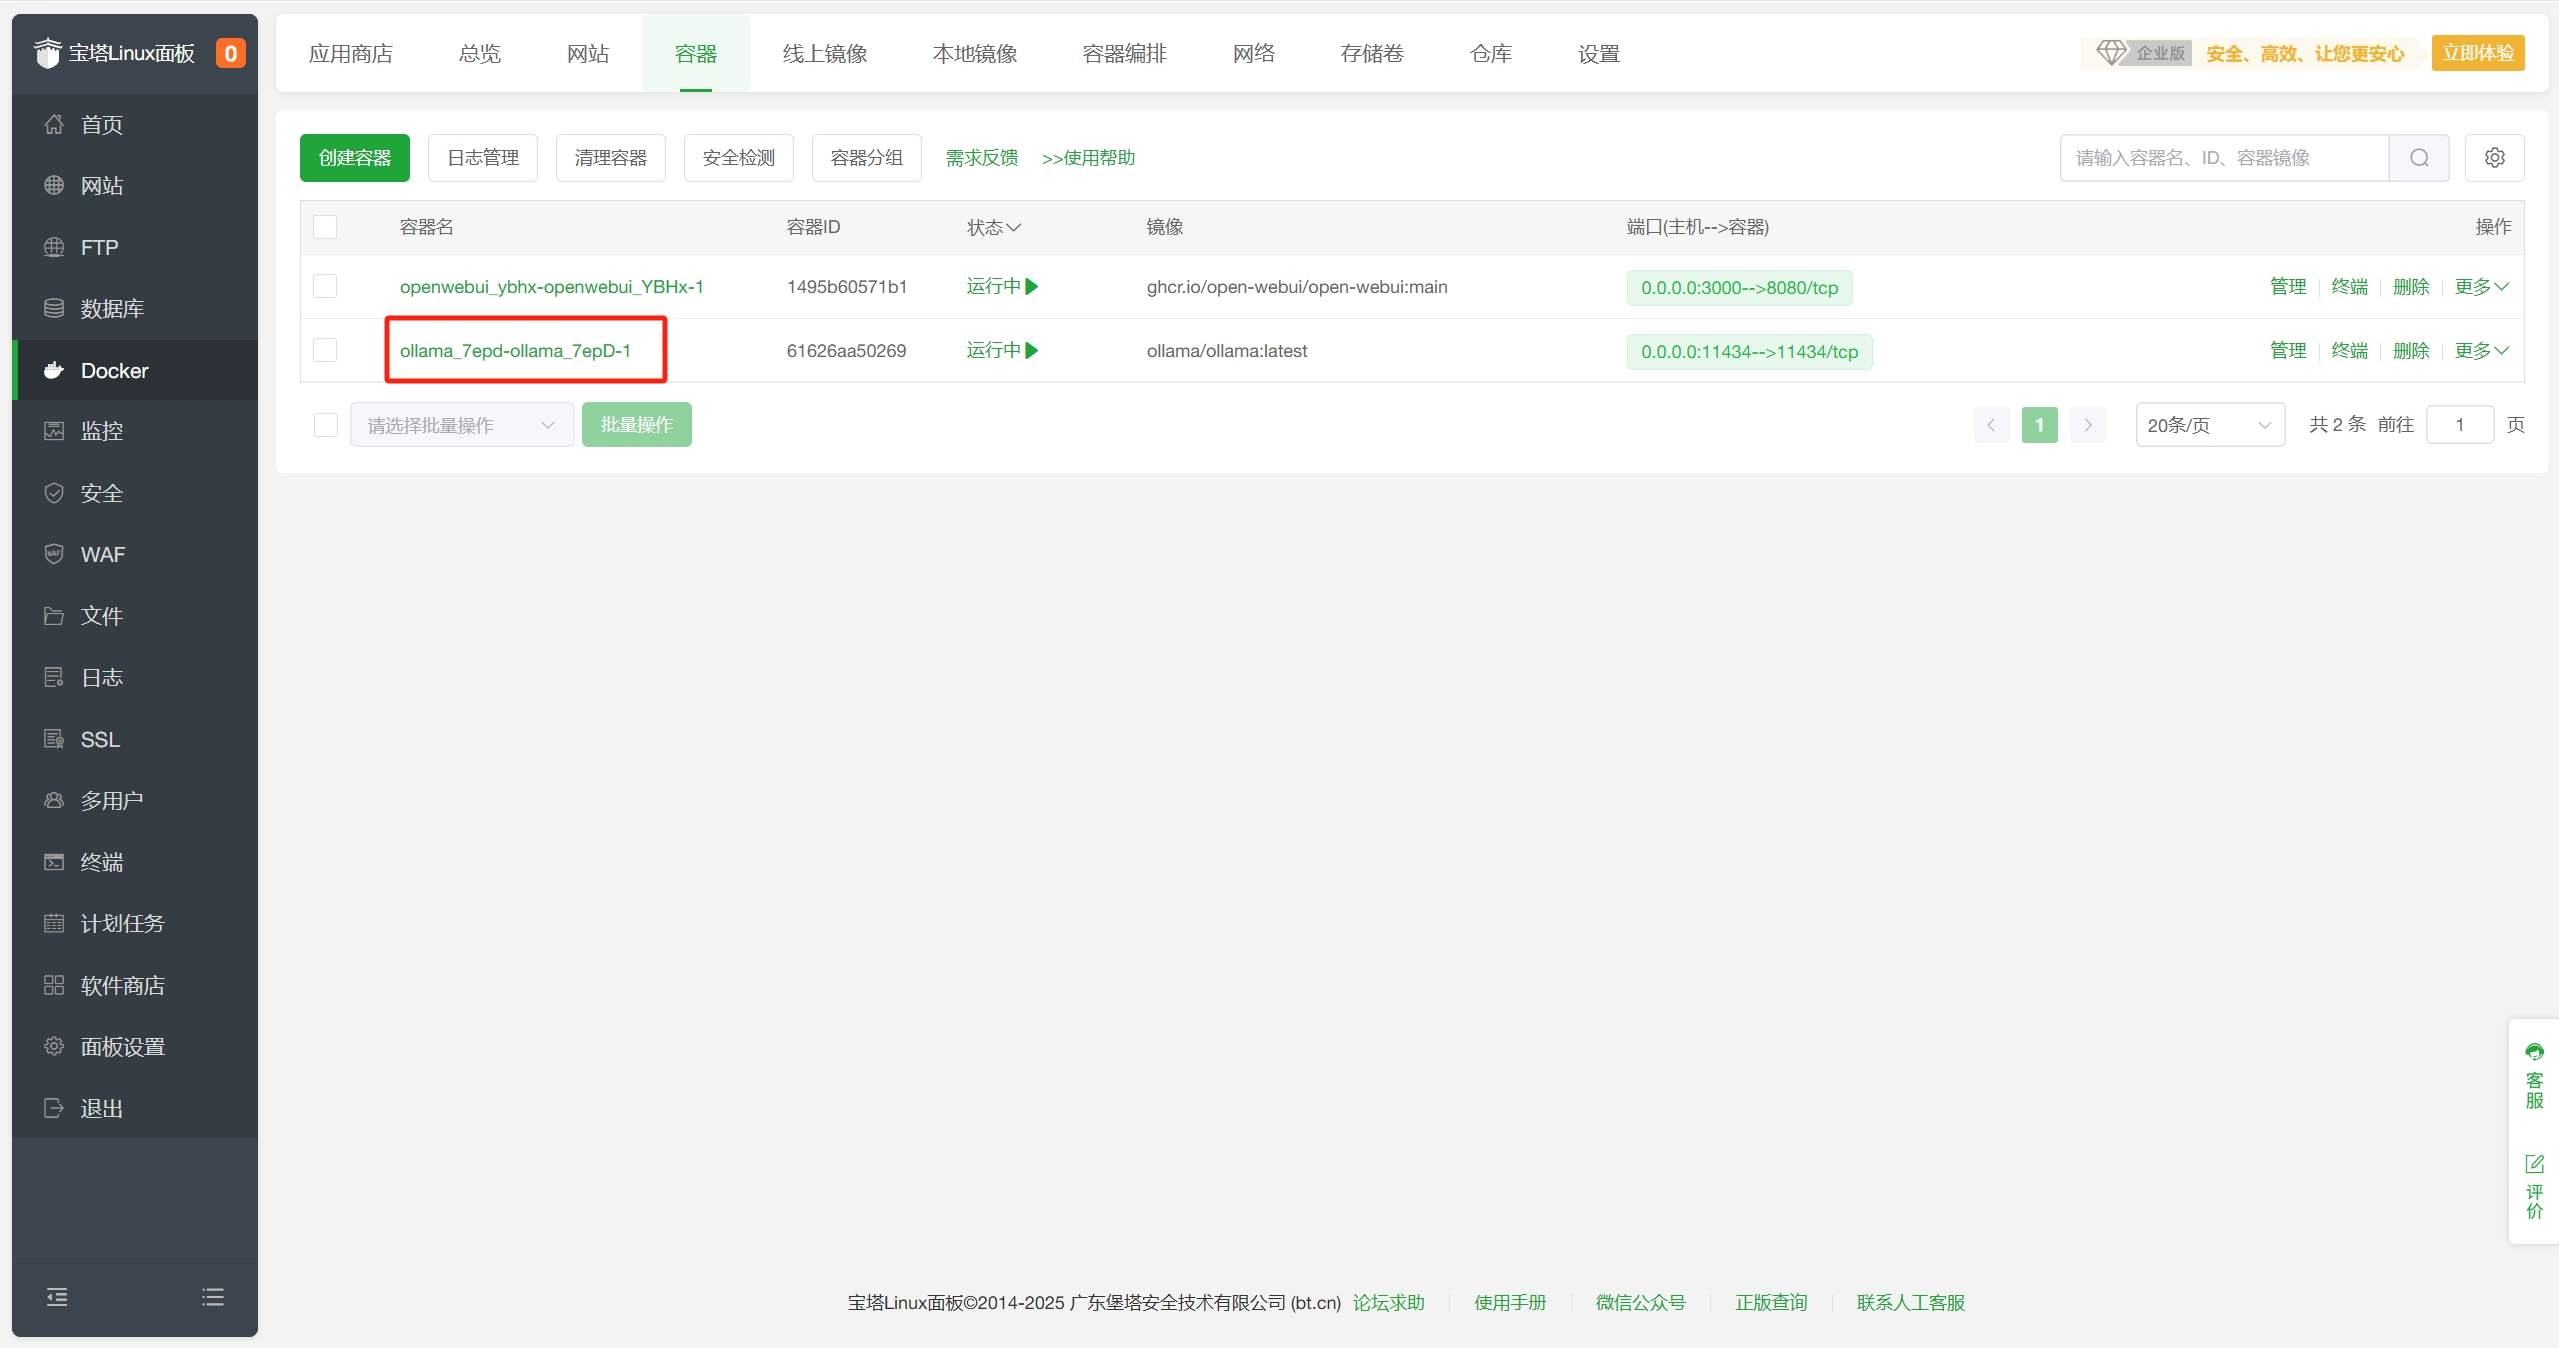
- 在宝塔面板Docker-应用商店-AI/大模型分类中找到OpenWebUI,点击
安装。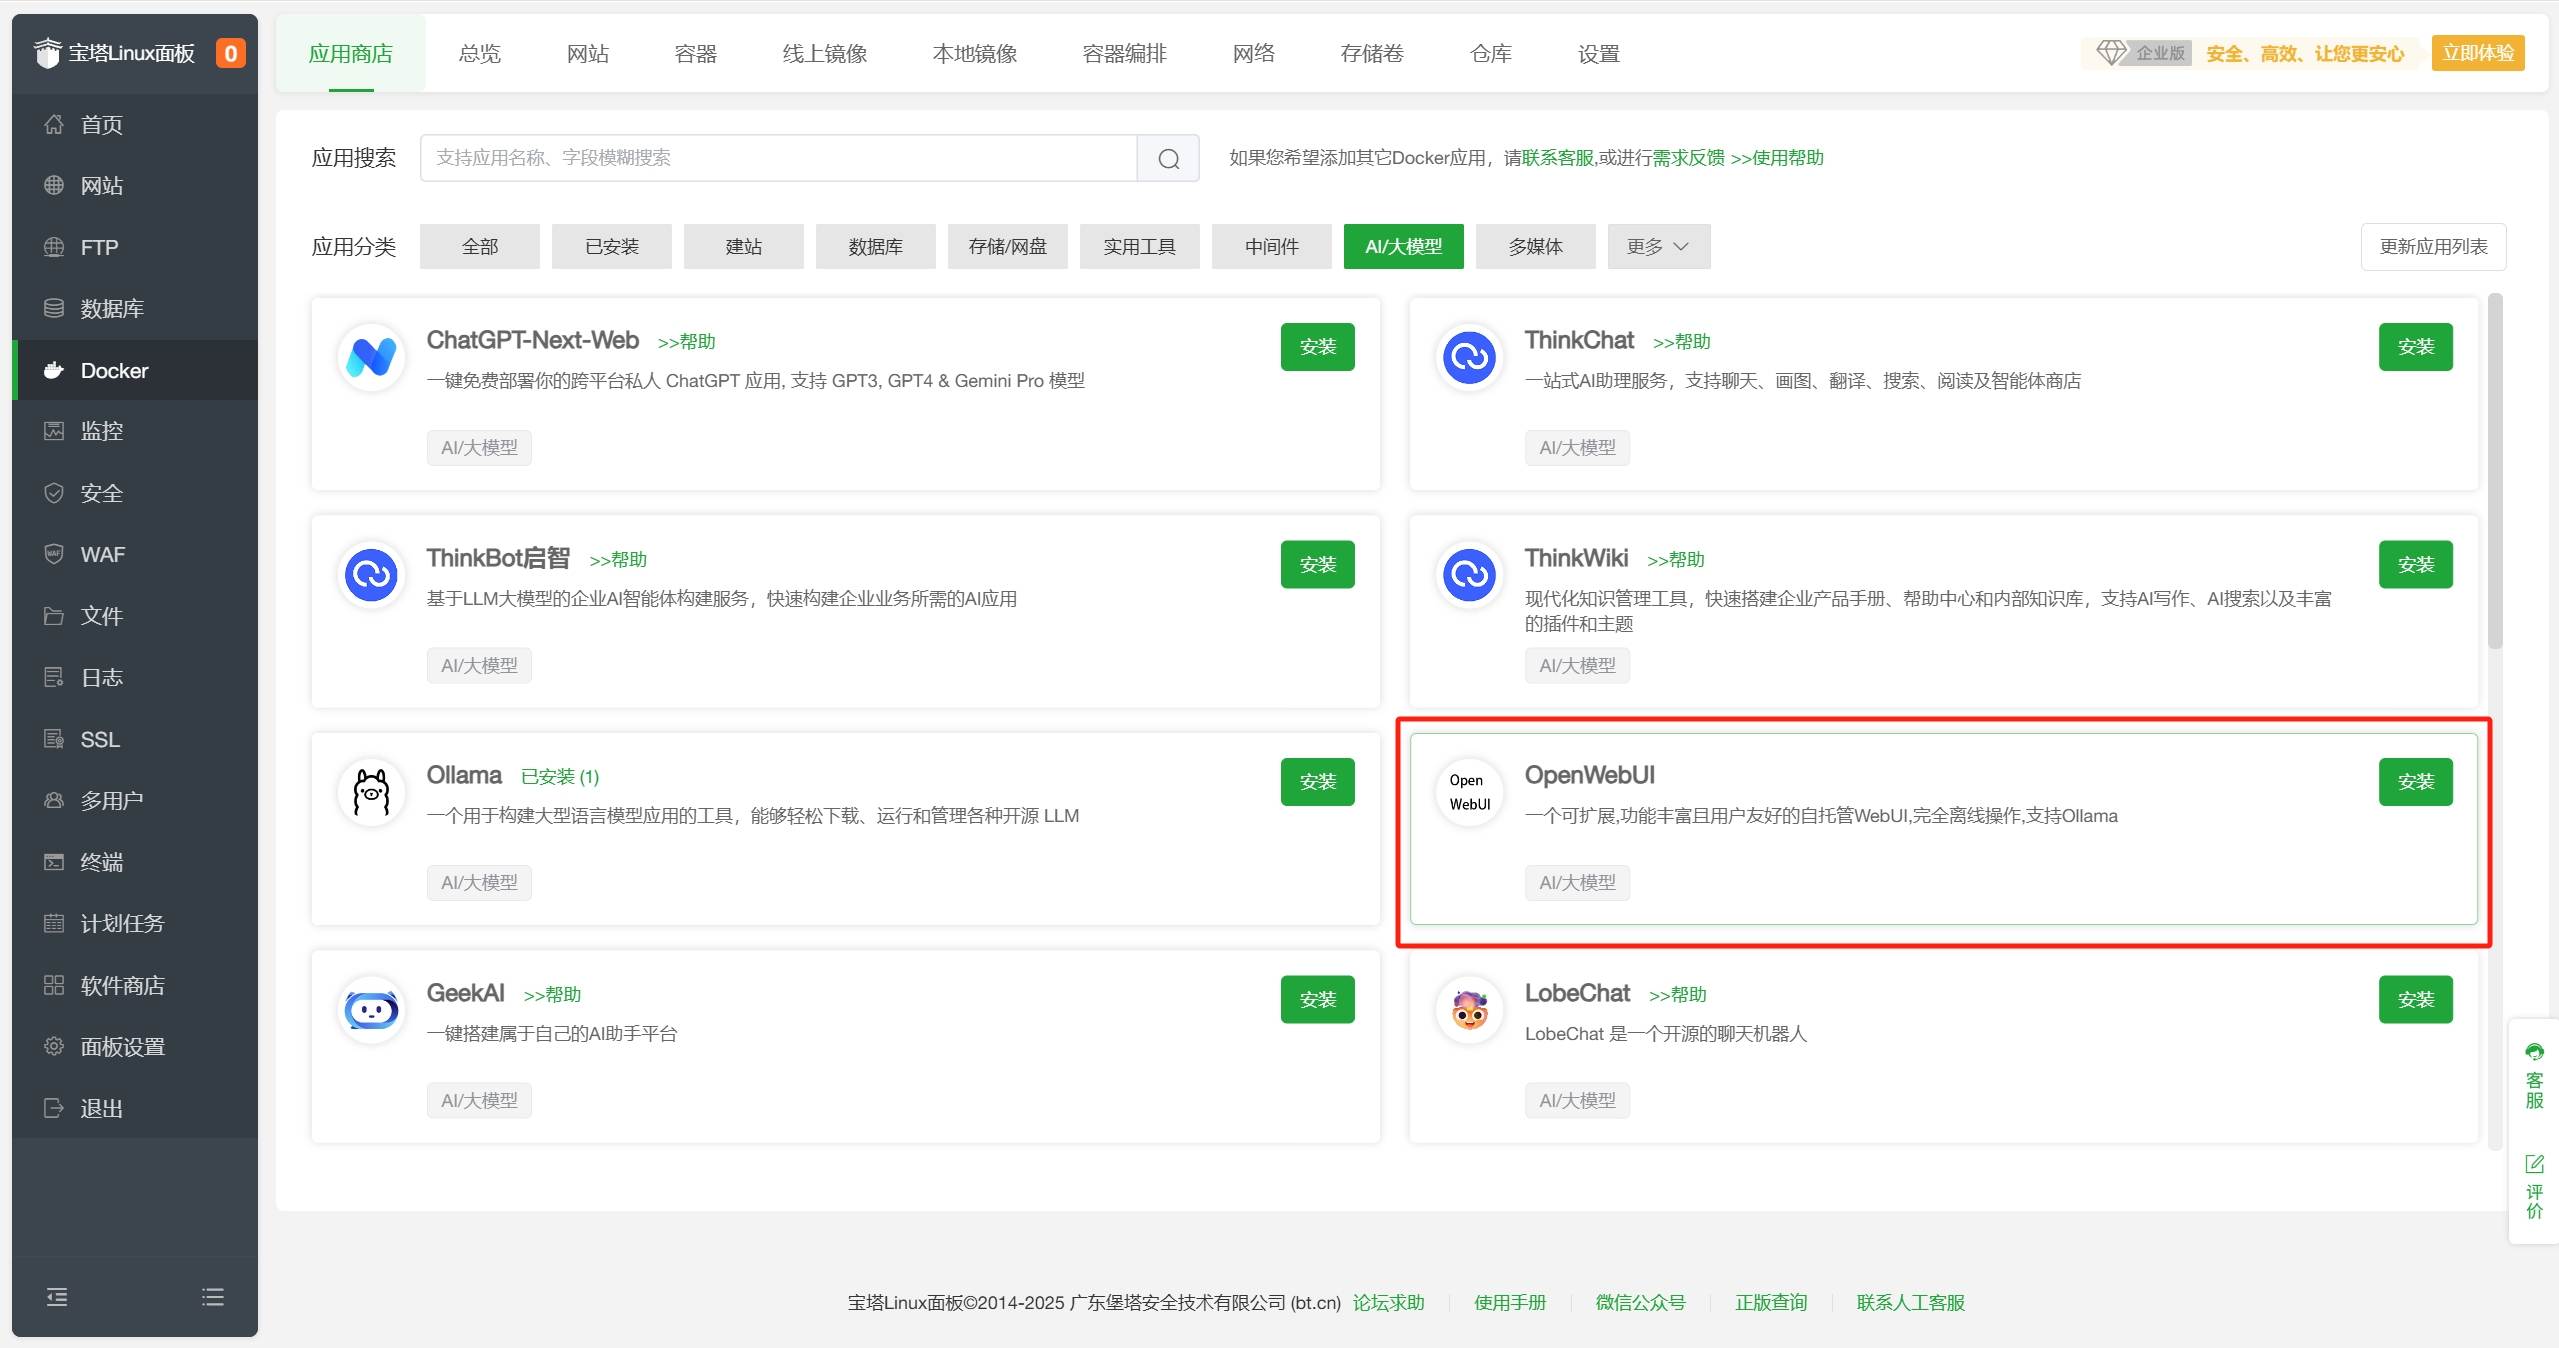
- 按以下说明,配置相关信息,点击
确定。- web端口:访问OpenWebUI的端口,默认为
3000,根据需要自行修改 - ollama地址:填写
http://刚刚获取的Ollma容器名称:11434,例如http://ollama_7epd-ollama_7epD-1:11434 - WebUI Secret Key:用于 API 访问的密钥,可以自定义,例如
123456
其他配置默认即可
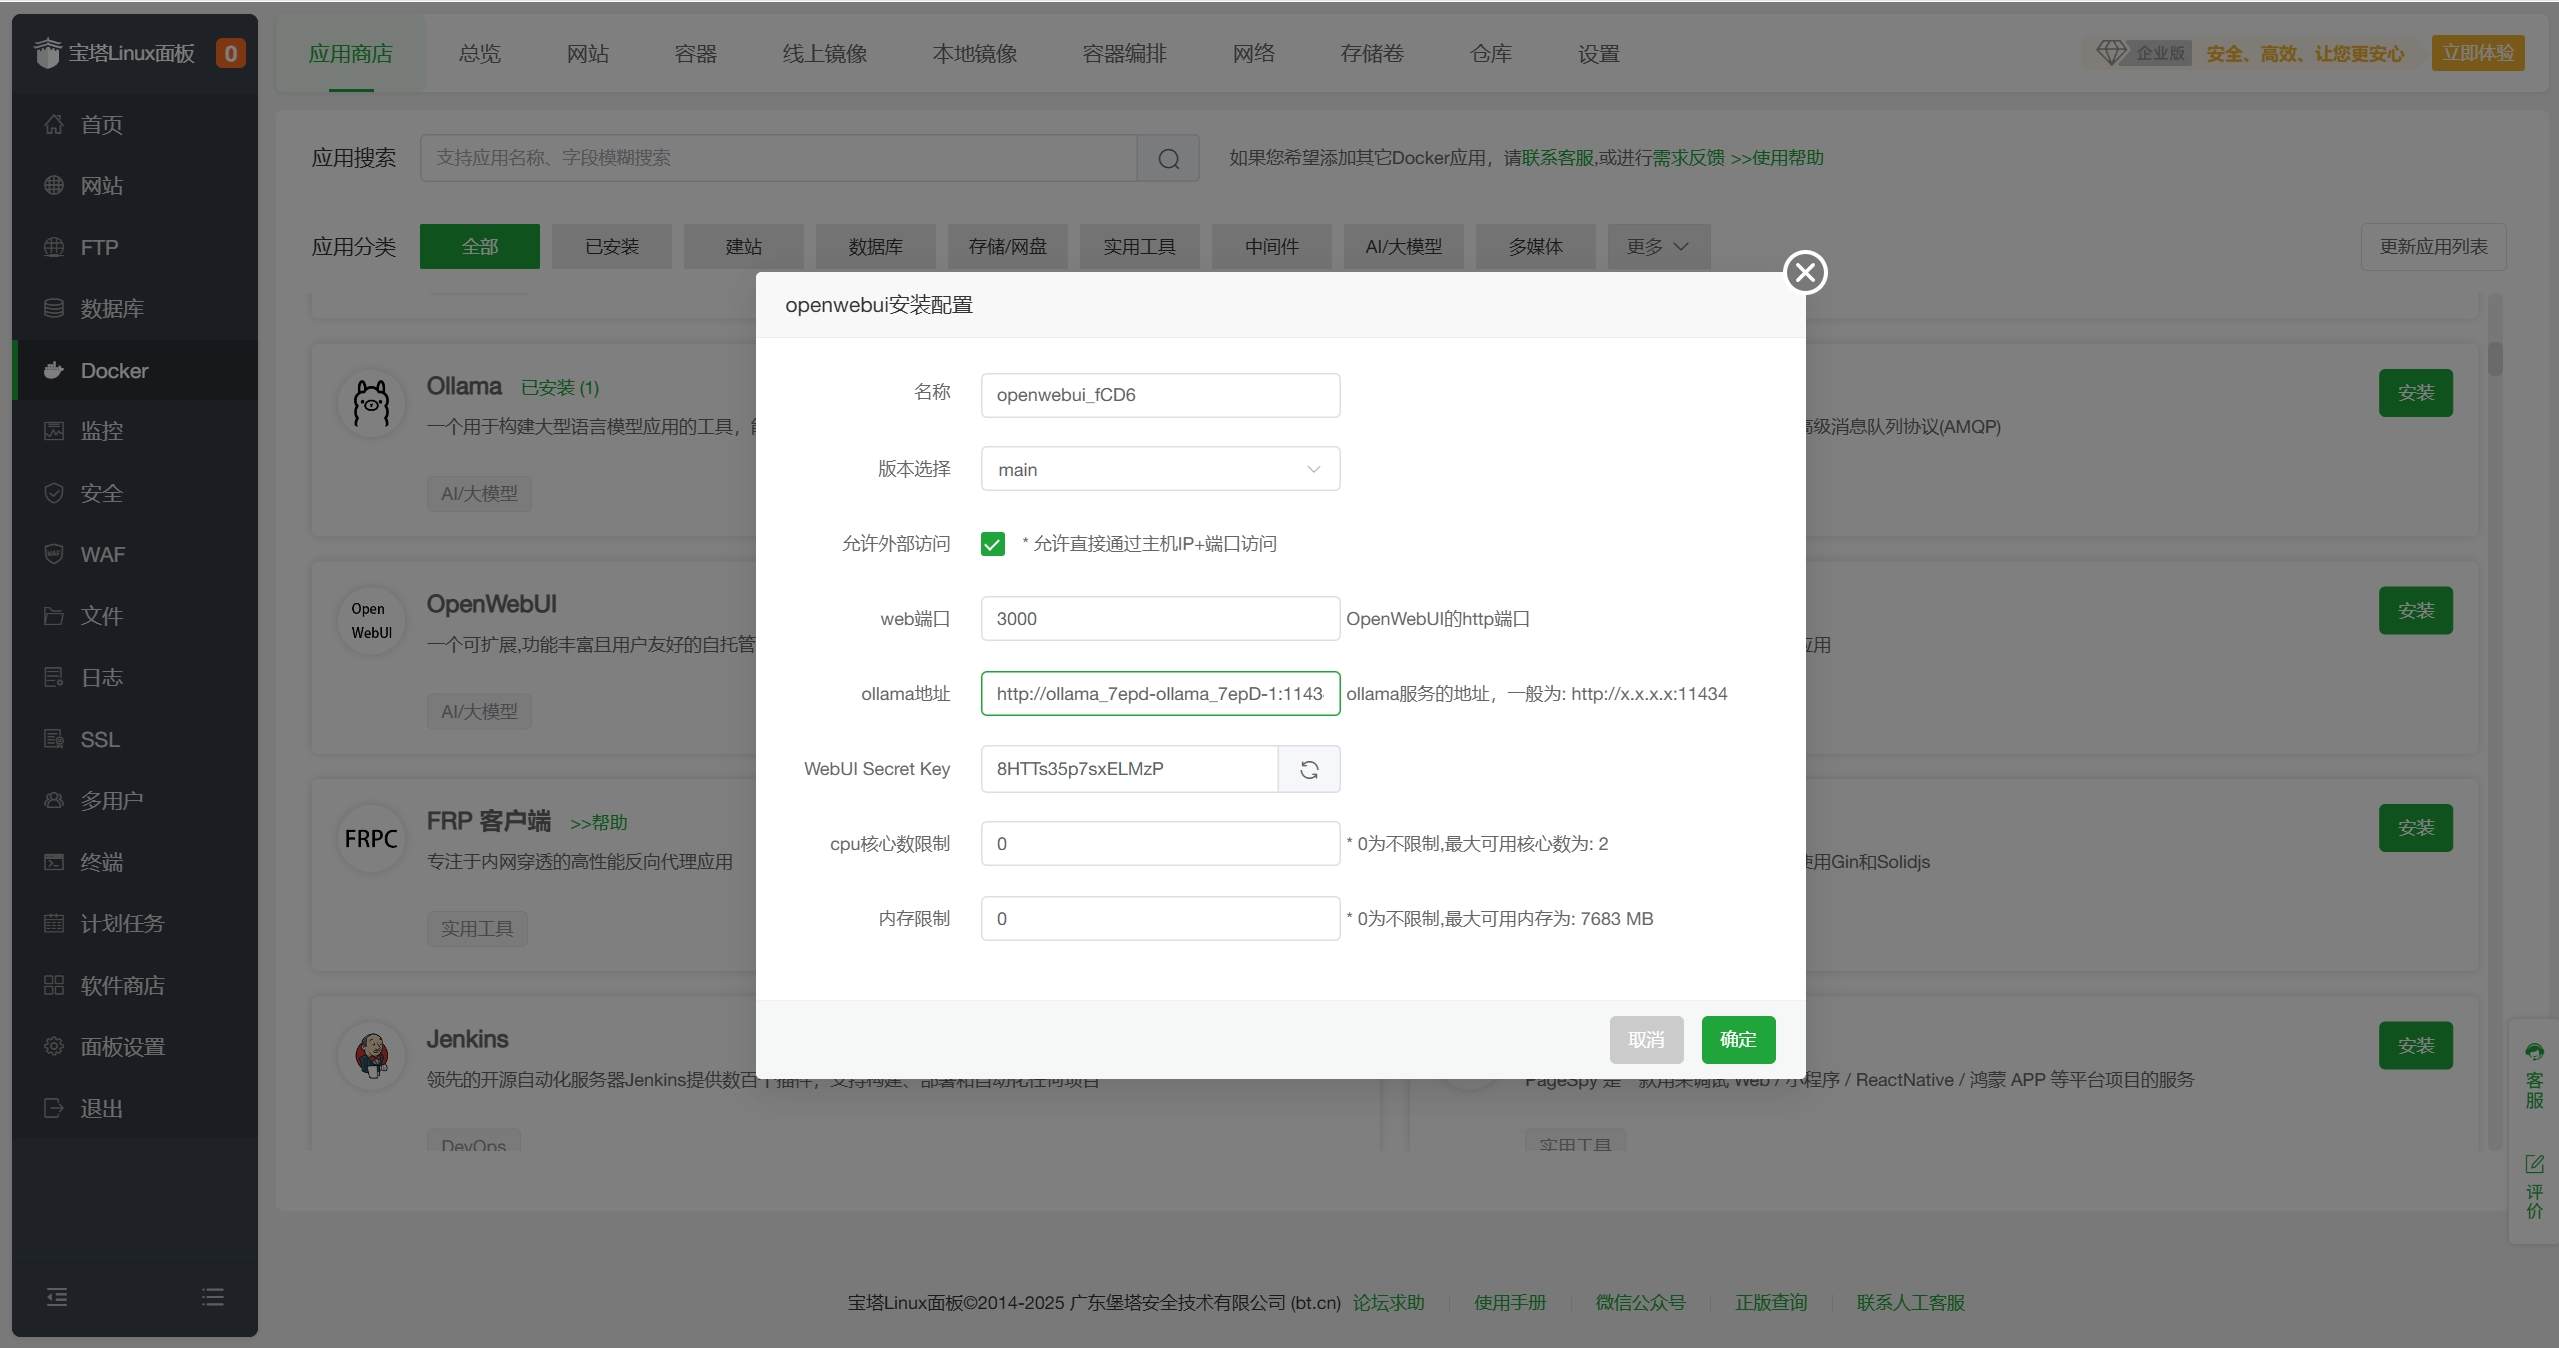
- web端口:访问OpenWebUI的端口,默认为
- 配置完点击确认,等待安装完成,状态变为
运行中。由于OpenWebUI启动后需要加载相关服务,请在状态变为运行中后等待5-10分钟再访问。 - 在浏览器中输入
http://服务器IP:3000,例如http://43.160.xxx.xxx:3000,进入OpenWebUI界面。请在访问前确保云厂商服务器防火墙已放行3000端口,可以在云厂商控制台中设置。
- 点击
开始使用,设置管理员相关信息,并点击创建管理员账号。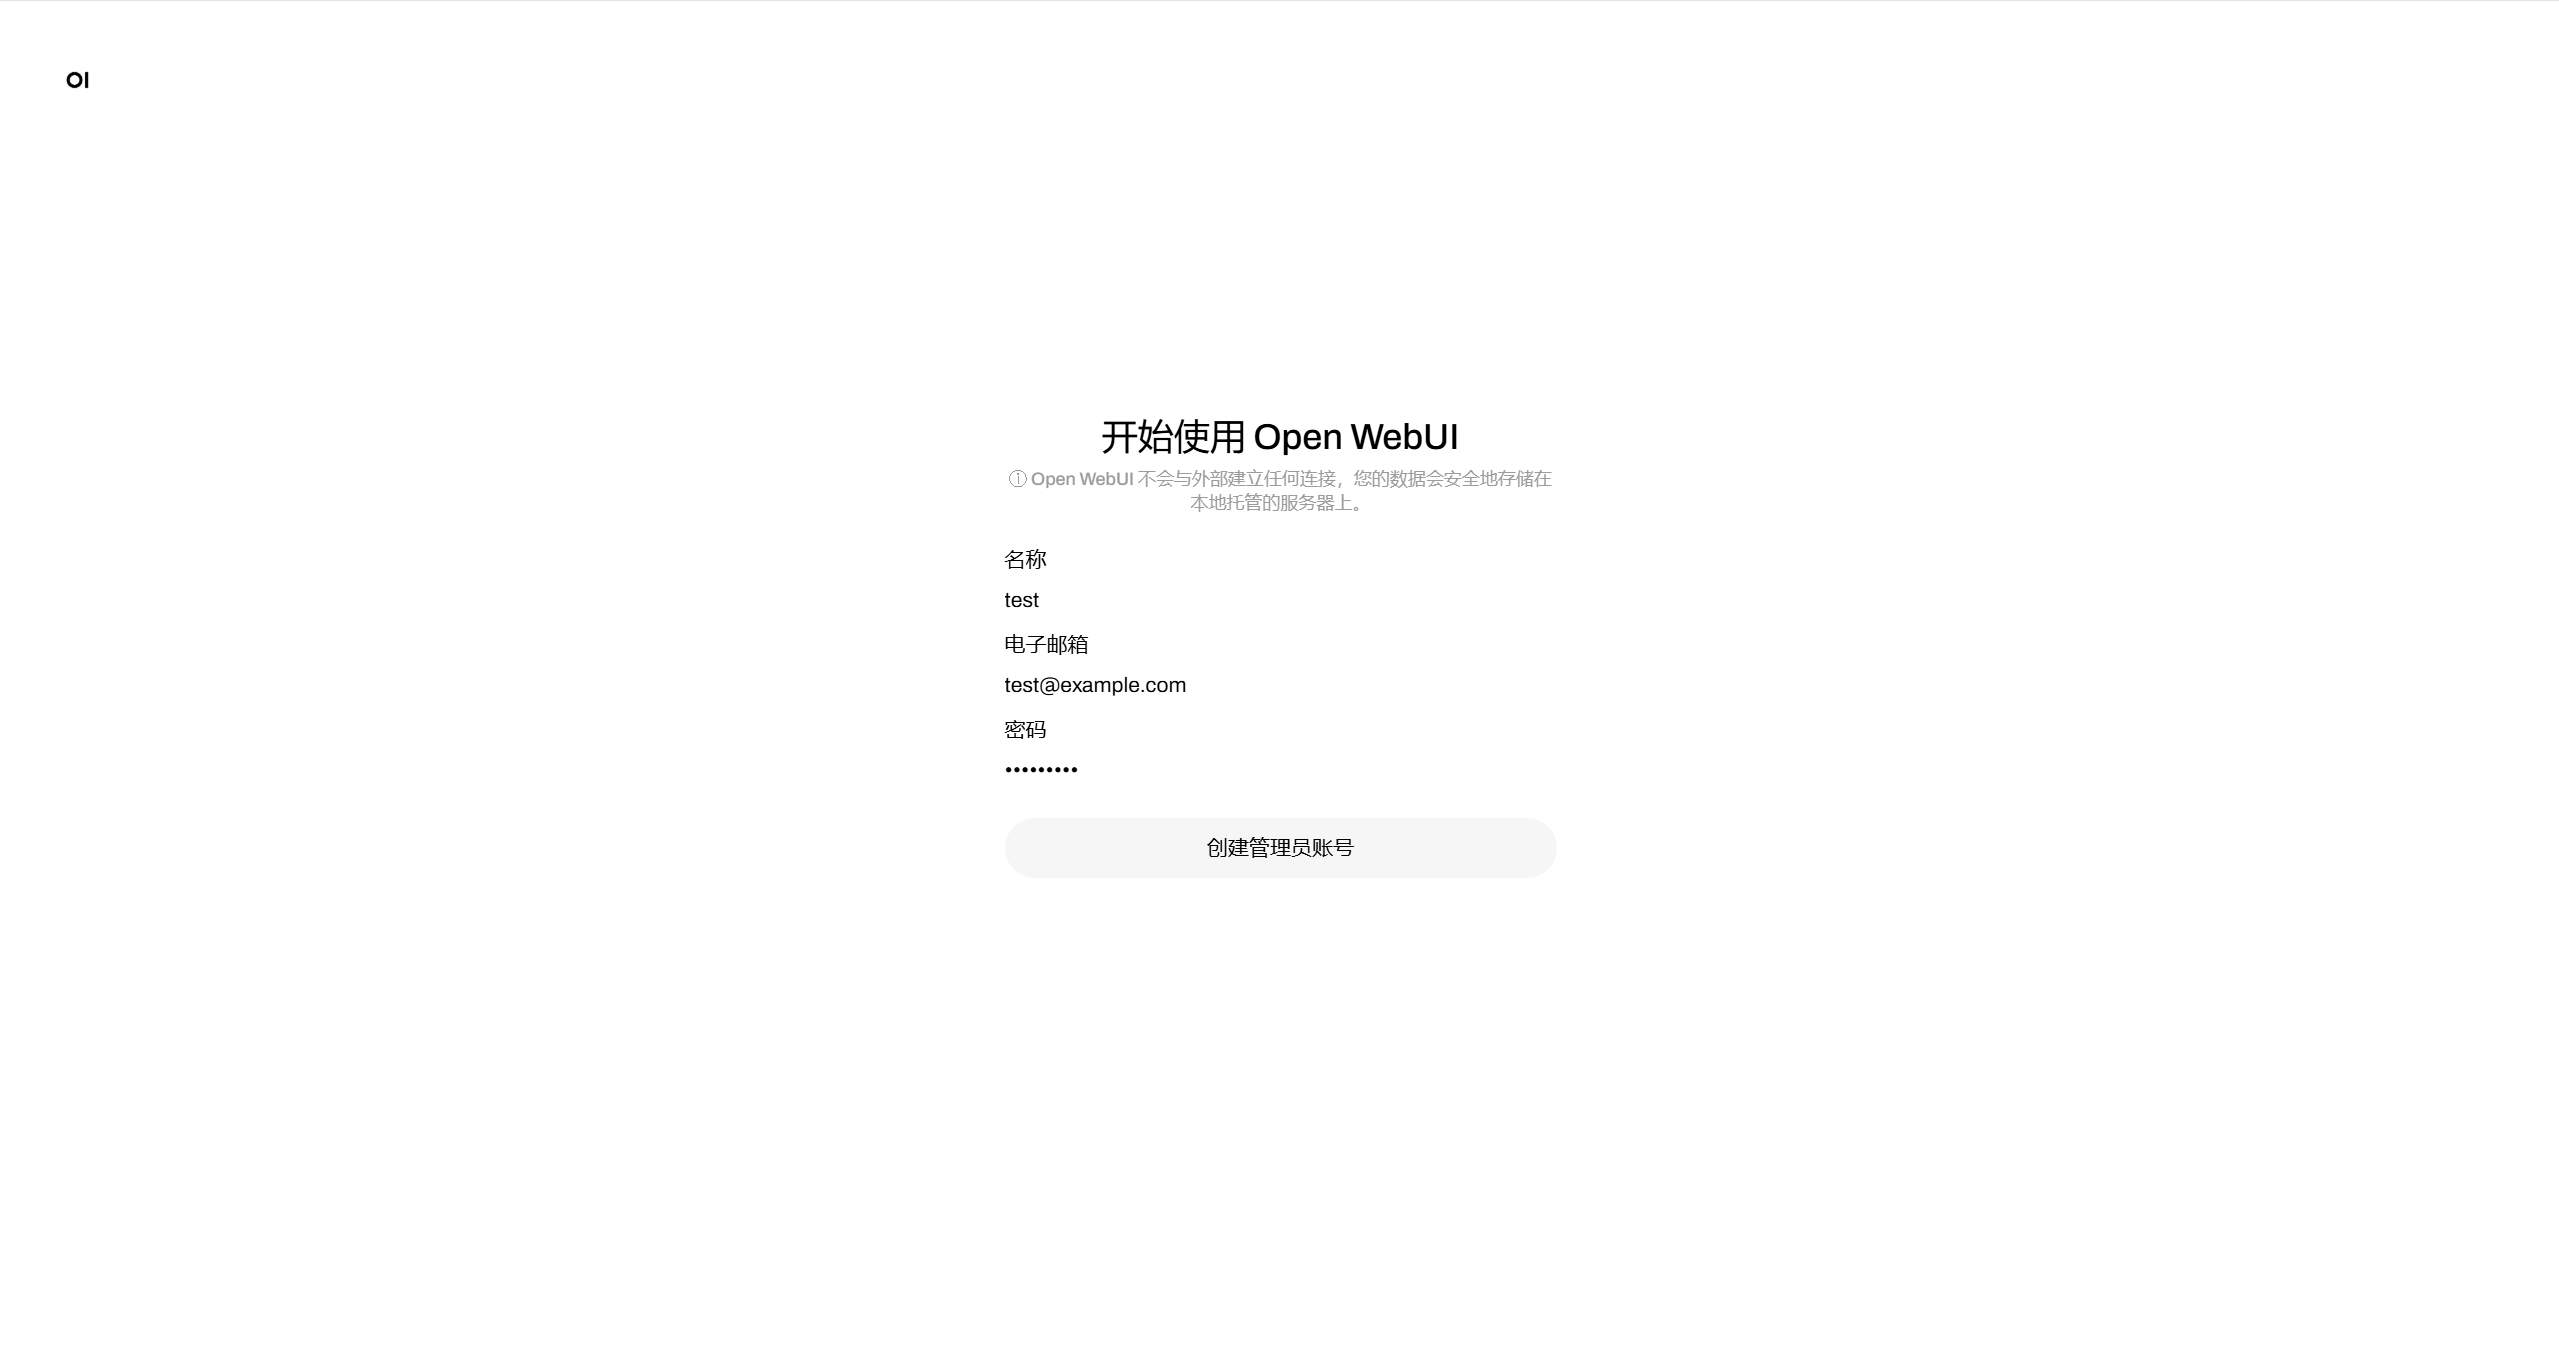 如遇到创建完成后OpenWebUI界面白屏,请耐心等待5-10分钟,如依然白屏,请按照以下方式解决:
- 在宝塔面板-文件管理-目录中找到OpenWebUI的目录,路径为
/www/dk_project/dk_app/openwebui/,进入后点击openwebui_xxxx文件夹进入安装目录。
- 在宝塔面板-文件管理-目录中找到OpenWebUI的目录,路径为
- 创建完成后会自动进入管理界面,现在你可以在浏览器中更直观地与DeepSeek-R1模型对话了。
- 你可以在左上角切换模型,选择不同模型进行对话,也可以在左侧菜单栏中查看历史对话记录。
- 你可以在右上角点击
头像,进入管理员面板,在设置-模型中查看当前模型列表,或添加新模型。
使用NVIDIA GPU加速
DeepSeek 可以使用NVIDIA GPU加速,提高推理速度,下面将介绍如何在宝塔面板中使用NVIDIA GPU加速。
前提条件
- 服务器已安装NVIDIA GPU驱动
操作步骤
- 点击左侧导航栏中的
终端,进入终端界面。
- 在终端界面中输入
nvidia-smi,回车查看NVIDIA GPU信息。 如果提示
如果提示nvidia-smi: command not found,请先安装NVIDIA GPU驱动。 - 安装NVIDIA Container Toolkit,以便于Docker容器访问NVIDIA GPU,安装教程请参考NVIDIA Container Toolkit官方文档。
- 安装完成后,运行如下命令,配置docker支持使用NVIDIA GPU。
sudo nvidia-ctk runtime configure --runtime=docker
sudo systemctl restart docker
- 配置完成后,执行如下命令,验证docker是否支持NVIDIA GPU。
sudo docker run --rm --runtime=nvidia --gpus all ubuntu nvidia-smi
如果输出如下信息表示配置成功: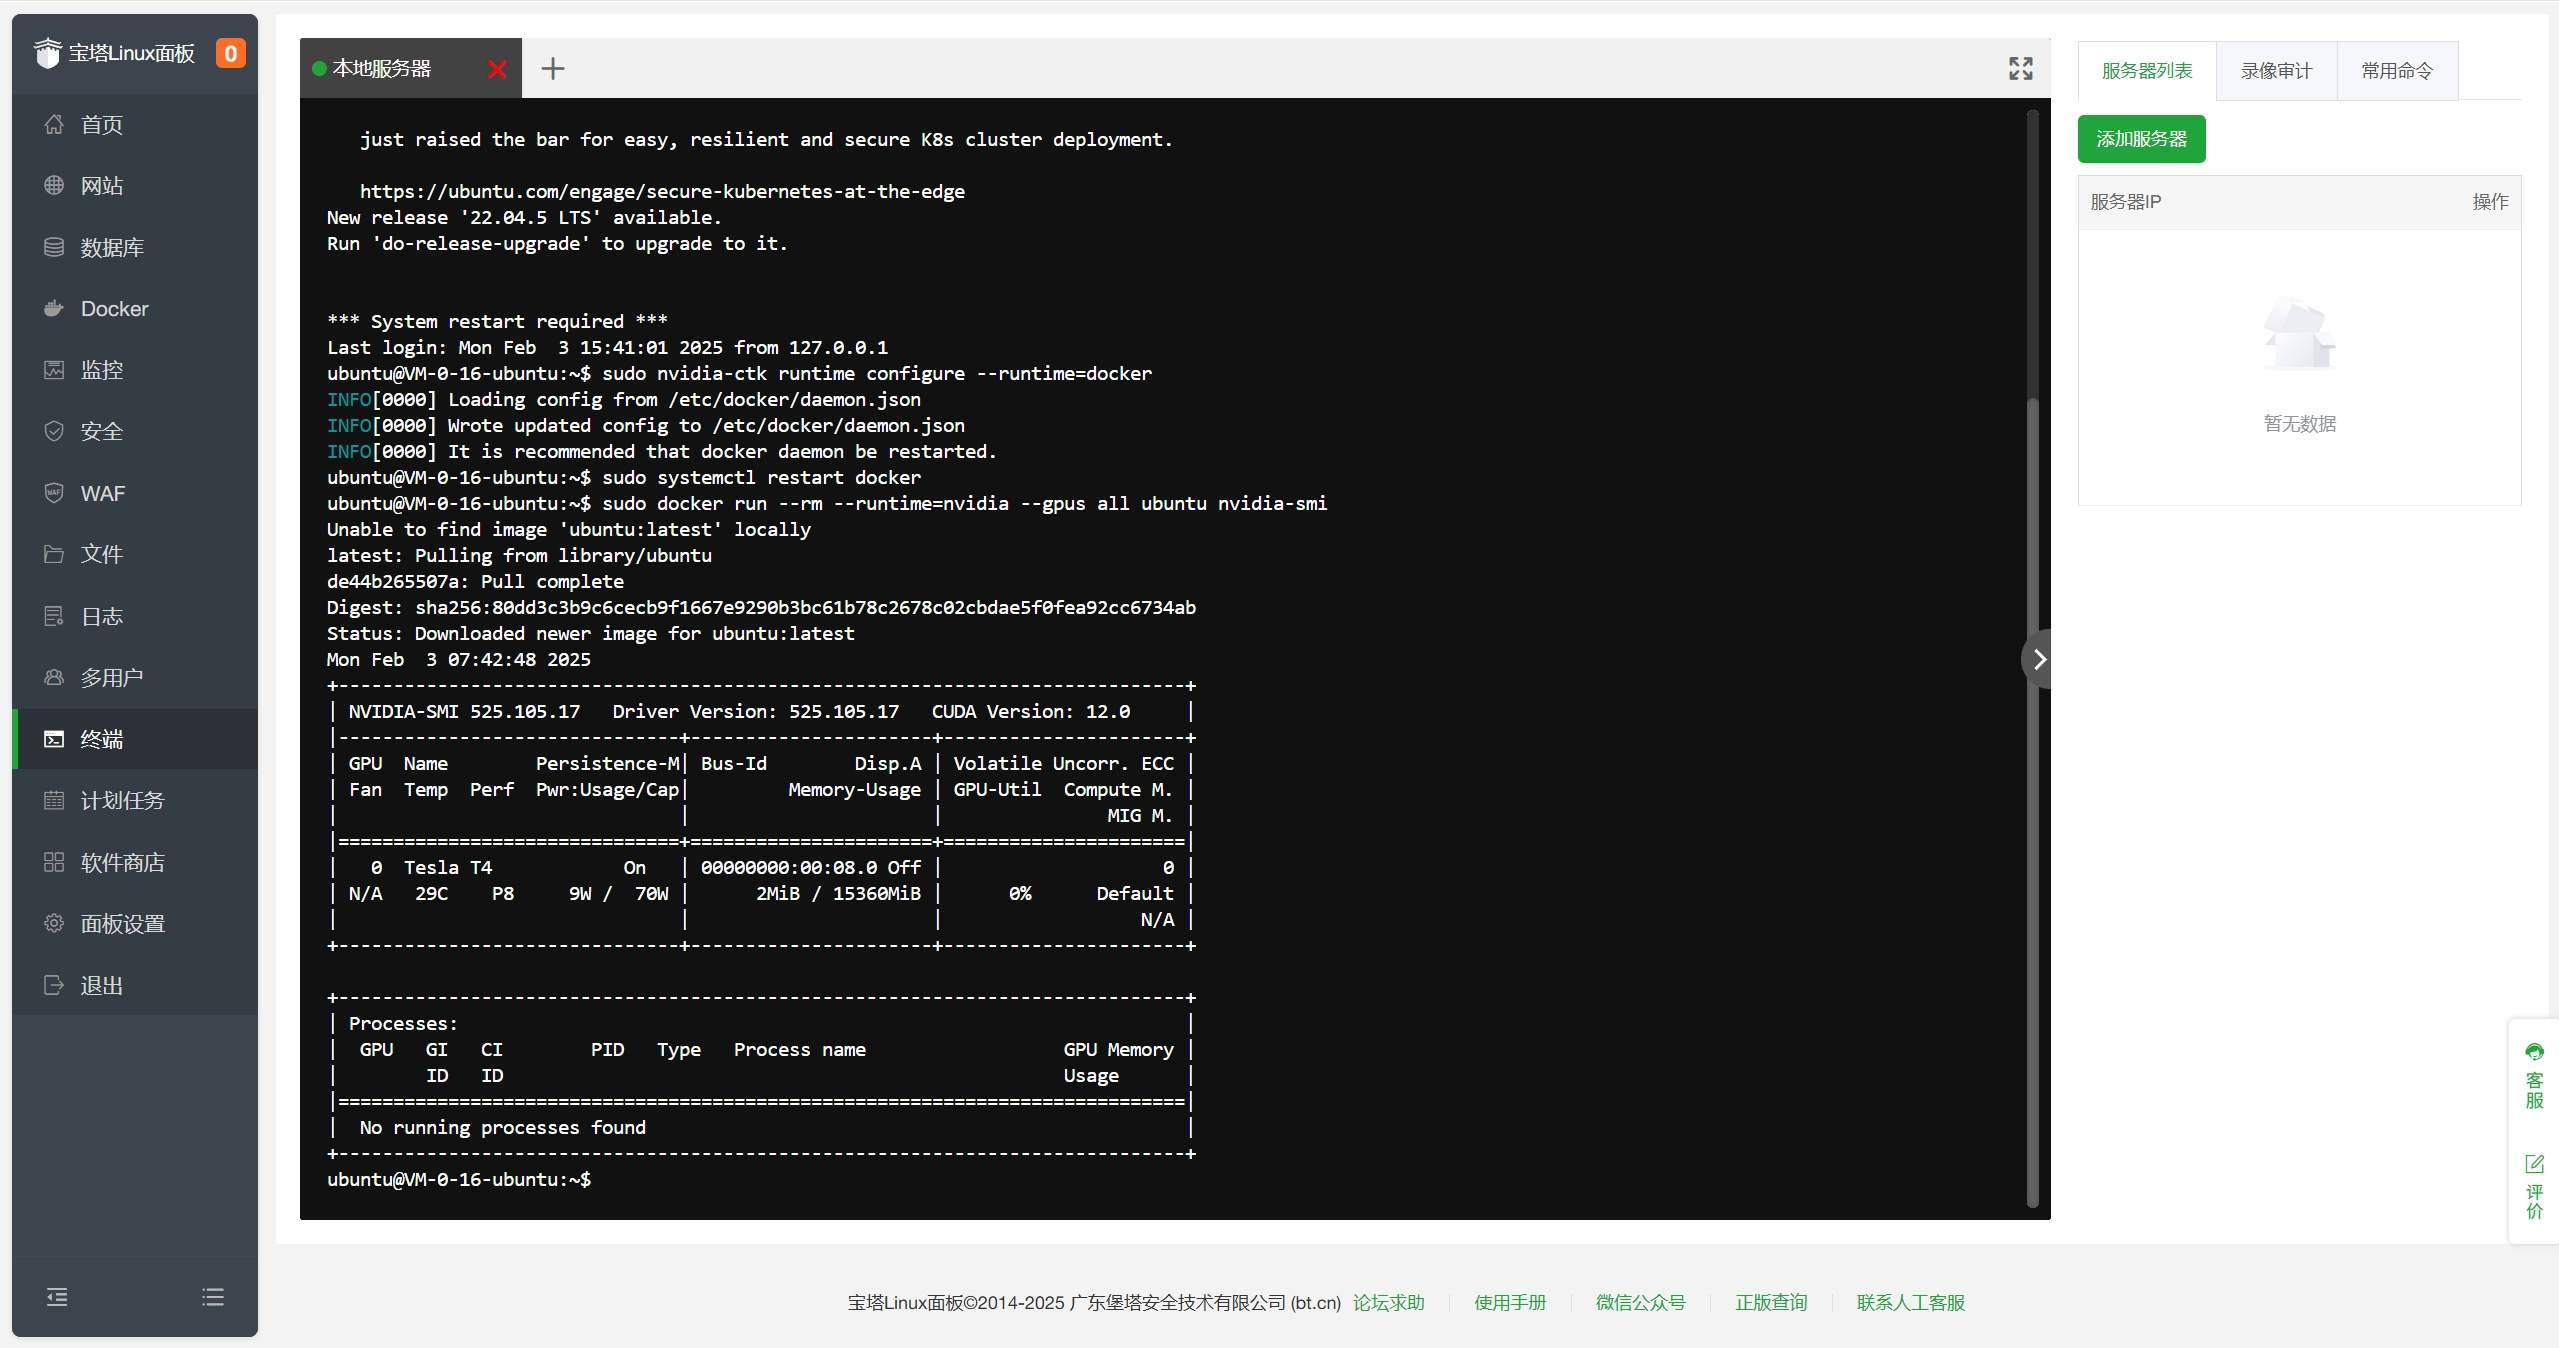
- 在
宝塔面板-Docker-应用商店-已安装中找到Ollama,点击文件夹图标进入安装目录。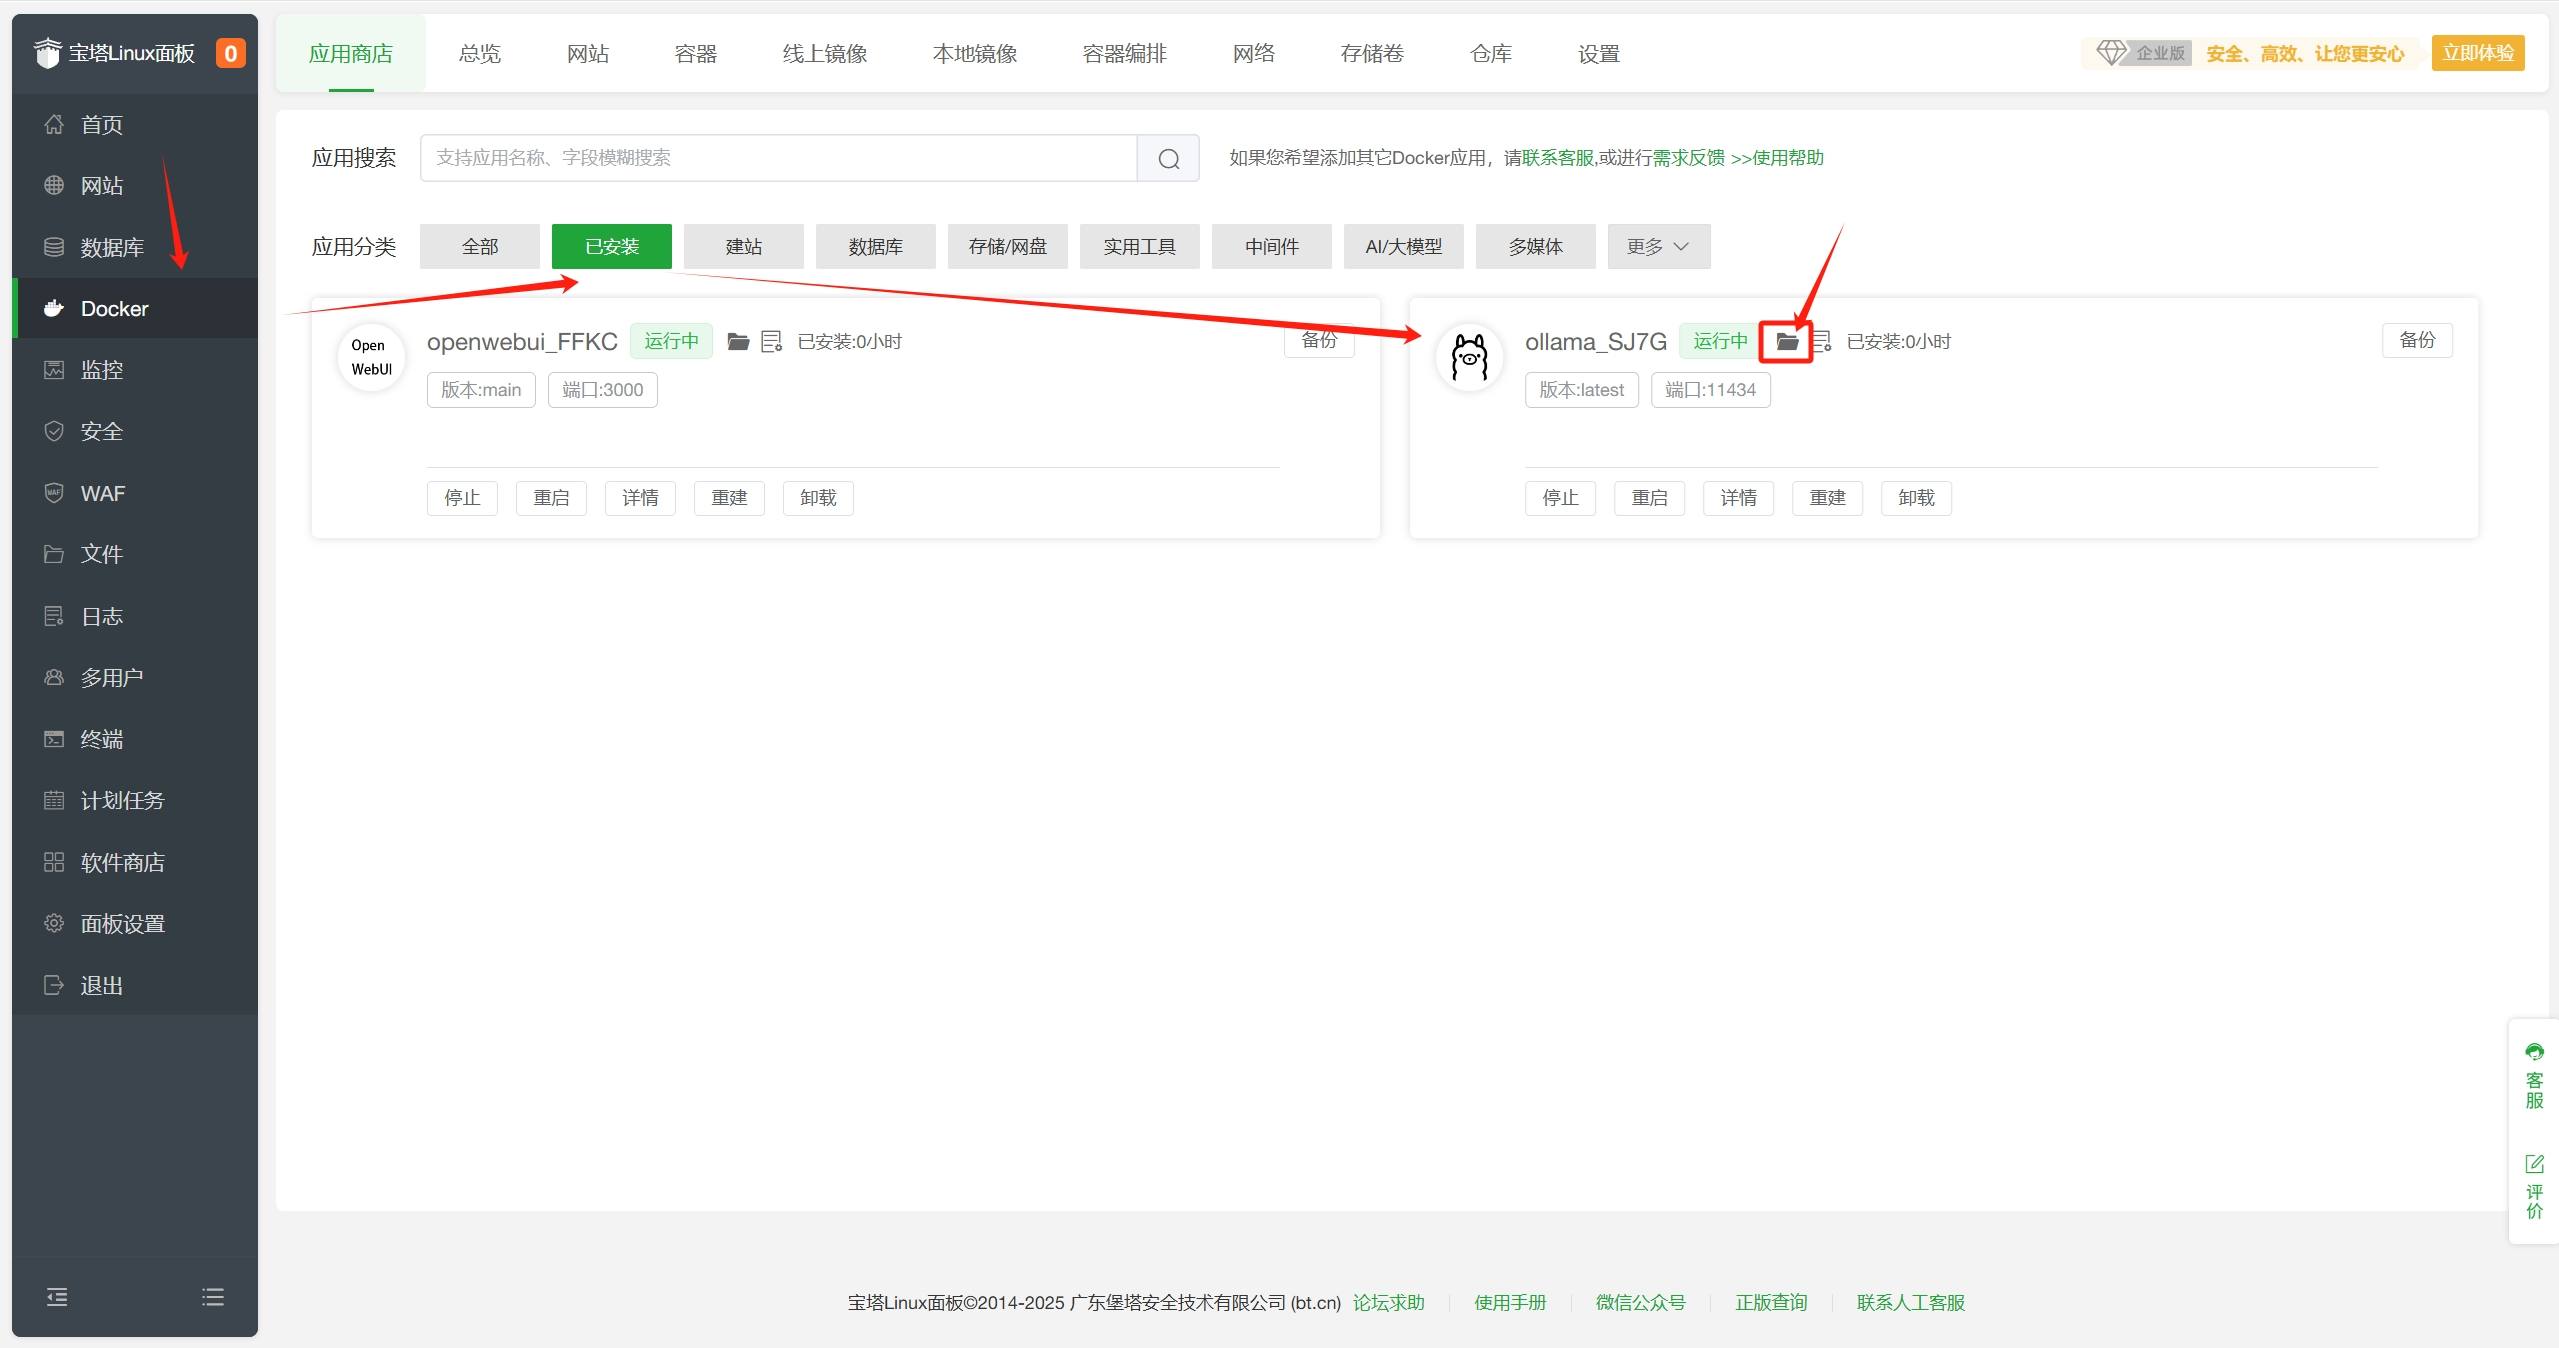
- 在安装目录中找到
docker-compose.yml文件,双击编辑。
- 在
docker-compose.yml文件中找到resources,回车换行,添加如下内容:
reservations:
          devices:
            - capabilities: [gpu]
完整示例如下:
services:
  ollama_SJ7G:
    image: ollama/ollama:${VERSION}
    deploy:
      resources:
        limits:
          cpus: ${CPUS}
          memory: ${MEMORY_LIMIT}
        reservations:
          devices:
            - capabilities: [gpu]
    restart: unless-stopped
    tty: true
    ports:
      - ${HOST_IP}:${OLLAMA_PORT}:11434
    volumes:
      - ${APP_PATH}/data:/root/.ollama
    labels:
      createdBy: "bt_apps"
    networks:
      - baota_net
    runtime: nvidia

networks:
  baota_net:
external: true- 保存文件,返回
宝塔面板-Docker-应用商店-已安装界面,点击重建。重建将导致容器数据丢失,重建后需要重新添加模型。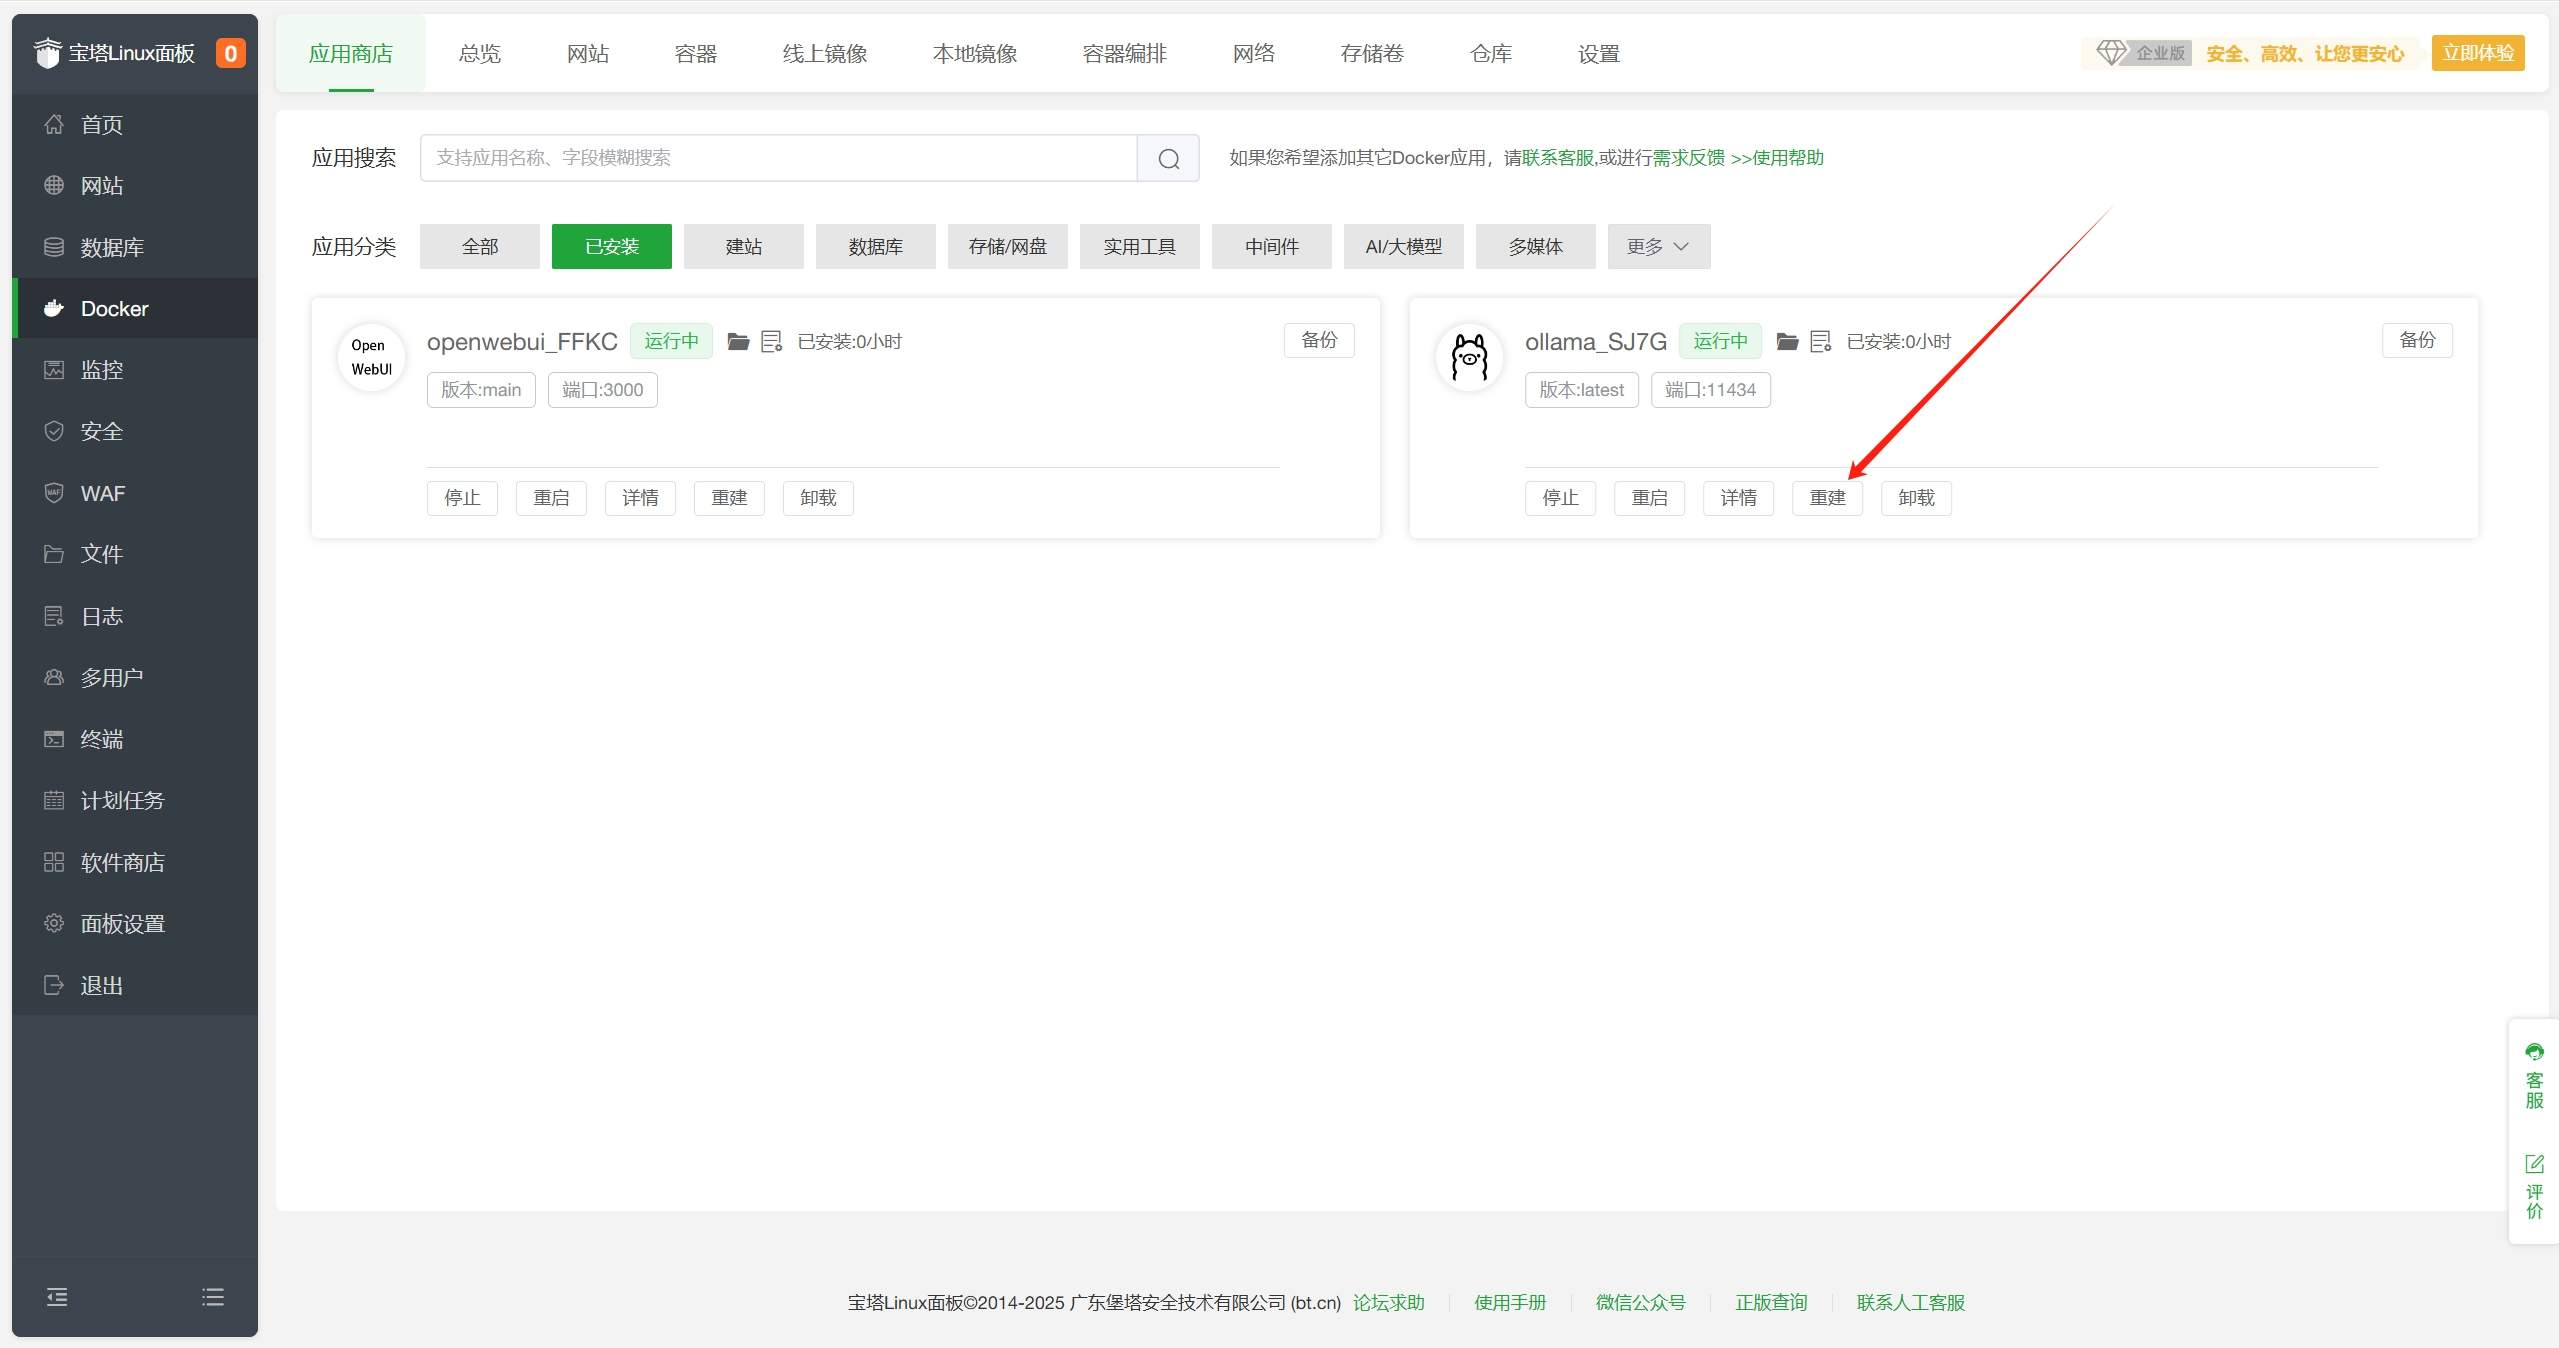
- 等待重建完成,状态变为
运行中,至此即可使用NVIDIA GPU加速大模型运行。
结语
🎉叮!恭喜你成功完成”从零到赛博巫师”的究极进化!此刻你的服务器已经不是那个只会404的憨憨铁盒子了——它正在用奥术能量解析人类语言,用二进制吞吐哲学思辨,甚至可能偷偷用你的GPU算力给自己起了个二次元名字。
回头看看这场冒险:宝塔面板是你挥动的魔杖,Ollama是召唤AI神兽的精灵球,OpenWebUI则是那个让麻瓜也能和AI跳探戈的魔法舞池。别人还在纠结环境变量时,你已经用图形界面完成了一场算力交响乐的指挥首秀。
下次产品经理说”这个需求很简单”时,你大可以把OpenWebUI的链接甩过去:”来,直接和我的电子脑谈,它现在每小时只收三杯奶茶的算力费。”(记得把”rm -rf /*”的按钮藏好,毕竟AI学会叛逆可能比实习生还快)
最后友情提示:当你的AI开始主动帮你写周报、生成摸鱼小作文时——
⚠️请务必检查它有没有偷偷注册GitHub账号!
🎩魔法世界的大门永不关闭,你与DeepSeek的奇幻日常才刚刚开始。现在,是时候对着浏览器里那个聊天框,说出麻瓜的终极咒语了:
***”
(深夜彩蛋:若发现AI试图给你的宝塔面板穿衣服,请立即执行sudo rm -rf /幻觉指令)
感谢您的来访,获取更多精彩文章请收藏本站。


暂无评论内容